
Loading...
Loading...
Loading...
Loading...
Loading...
Loading...
Loading...
Loading...
Loading...
Loading...
Loading...
Loading...
Loading...
Loading...
Loading...
Loading...
Loading...
Loading...
Loading...
Loading...
Loading...
Loading...
Loading...
Loading...
Loading...
Loading...
Loading...
Loading...
Loading...
Loading...
Loading...
Loading...
Loading...
Loading...
Loading...
Loading...
Loading...
Loading...
Loading...
Loading...
Loading...
Loading...
Loading...
Loading...
Loading...
Loading...
Loading...
Loading...
Loading...
Loading...
Loading...
Loading...
Loading...
Loading...
Loading...
Loading...
Loading...
Loading...
Loading...
Loading...
Loading...
Loading...
Loading...
Loading...
Loading...
Loading...
Loading...
Loading...
Loading...
Loading...
Loading...
Loading...
Loading...
Loading...
Loading...
Loading...
Loading...
Loading...
Loading...
Loading...
Loading...
Loading...
Loading...
Loading...
Loading...
Loading...
Loading...
Loading...
Loading...
Loading...
Loading...
Loading...
Loading...
Loading...
Loading...
Loading...
Welcome to Bamboozle WIKI and Document Library, our single source for information about all our products and services.
Bamboozle is an ISO 27001-certified, environmental friendly cloud service provider. The company, which was established in 2015 and is run by its founders, offers premium cloud services with a focus on simplicity, efficiency and price/performance for all kinds of companies.
Cloud
Servers
Cyber-Protect


Prerequisites
Virtual machines are created, as described in Creating virtual machines.
To monitor virtual machine’s CPU, storage, and network usage
Select the VM and open the Monitoring tab.
The default time interval for the charts is twelve hours. To zoom into a particular time interval, select the internal with the mouse; to reset zoom, double-click any chart.
The following performance charts are available:
CPU / RAMCPU and RAM usage by the VM.NetworkIncoming and outgoing network traffic.Storage read/writeAmount of data read and written by the VM.Read/write latencyRead and write latency. Hovering the mouse cursor over a point on the chart, you can also see the average and maximum latency for that moment, as well as the 95 and 99 percentiles.
Averaged values are calculated every five minutes.
As all Linux guests have OpenSSH Server preinstalled by default, you only need to make sure a Linux template has cloud-init installed.
The easiest way to get a Linux template with cloud-init installed is to obtain it from its official repository. You can also create a Linux template from an existing boot volume.
Each virtual machine (VM) is an independent system with an independent set of virtual hardware. Its main features are the following:
A virtual machine resembles and works like a regular computer. It has its own virtual hardware. Software applications can run in virtual machines without any modifications or adjustment.
Virtual machine configuration can be changed easily, for example, by adding new virtual disks or memory.
Although virtual machines share physical hardware resources, they are fully isolated from each other (file system, processes, sysctl variables) and the compute node.
A virtual machine can run any supported guest operating system.
The following table lists the current virtual machine configuration limits:
To create a VM customizable with user data
Install cloud-init and OpenSSH Server in the virtual machine.
Enable logging for virtual machines that will be created from the template.
Convert the VM boot volume to the template, as described in Creating images from volumes.
RAM
1 TiB
CPU
64 virtual CPUs
Storage
15 volumes, 512 TiB each
Network
15 NICs
Limitations
A VM is removed along with its disks that have the Delete on termination option enabled during the VM deployment.
Prerequisites
Virtual machines are created, as described in Creating virtual machines.
To remove one virtual machine
Click the ellipsis button next to a VM you want to delete, and then click Delete.
Click Delete in the confirmation window.
To remove multiple virtual machines
Select the check boxes next to VMs you want to delete.
Over the VM list, click Delete.
Click Delete in the confirmation window.
o access Flow Object Storage with Mountainduck, please follow these steps:
Download (https://mountainduck.io) and install Mountainduck
Open CyberDuck and click Open Connection.
Specify your the credentials which are provided in our customer portal (https://portal.bamboozle.me):
Server: Insert the DNS name of the S3 endpoint (Your location is mentioned in your account in our portal): Location Dubai: dxb.bbzs3.com
Access Key ID: Insert the displayed Access Key from our portal.
Secret Access Key ID: Insert the displayed Secret Key from our portal.
Press the connect button
In the Cyber Protect console, you can manage workloads and plans, change the protection settings, configure reports, or check the backup storage.
The Cyber Protection console provides access to additional services or features, such as File Sync & Share or Antivirus and Antimalware protection, Patch management, Device control, and Vulnerability assessment. The type and number of these services and features vary according to your Cyber Protection license.
To check the dashboard with the most important information about your protection, go to Monitoring > Overview.
Depending on your access permissions, you can manage the protection for one or multiple customer tenants or units in a tenant. To switch the hierarchy level, use the drop-down list in the navigation menu. Only the levels to which you have access are shown. To go to the management portal, click Manage.
The Devices section is available in simple and table view. To switch between them, click the corresponding icon in the top right corner.
The simple view shows only a few workloads.
We provide following options to pay your Bills:
Credit Cards (all major Cards are supported)
Apple Pay (on supported Apple Devices)
Enterprise Customer can opt to pay via Bank Transfer.
Bamboozle Object Storage is an S3-compatible object storage service that lets you store and serve large amounts of data. You can create them in a few seconds and use them immediately with no configuration. Data transfer is automatically secured with HTTPS, and the available storage capacity scales seamlessly.
Object Storage are ideal for storing static, unstructured data like audio, video, and images as well as large amounts of text. Use cases like databases, applications written in server-side languages, and mission-critical applications will work best with local storage (volumes).
In the Create volume window, specify the volume name, size, and select a storage policy.
Click Create.
The new volume will appear on the Volumes screen.
A security group is a set of network access rules that control incoming and outgoing traffic to virtual machines assigned to this group. With security group rules, you can specify the type and direction of traffic that is allowed access to a virtual interface port. Traffic that does not satisfy any rule is dropped.
For each project, the default security group is automatically created in the compute cluster. This group allows all traffic on all ports for all protocols and cannot be deleted. When you attach a network interface to a VM, the interface is associated with the default security group, unless you explicitly select a custom security group.
You can assign one or more security groups to both new and existing virtual machines. When you add rules to security groups or remove them, the changes are enforced at runtime.
You can manage only IPv4 security group rules.
You cannot delete a security group if it is assigned to a VM.
On the Security groups screen, click Add security group.
In the Add security group window, specify a name and description for the group, and then click Add.
By default, the new security group will deny all incoming traffic and allow only outgoing traffic to assigned virtual machines.
On the Security groups screen, click the required security group.
On the group right pane, click Delete.
Click Delete in the confirmation window.
A volume is removed along with all of its snapshots.
On the Volumes screen, click Create volume.
In the Create volume window, specify a volume name and size in gigabytes, select a storage policy, and then click Create.
On the Volumes tab, check the status of the volume you want to remove.
If the status is "In use", click the volume, and then click Force detach.
If the status is "Available", click the volume, and then click Delete.
You can also configure static routes of a router by manually adding entries into its routing table. This can be useful, for example, if you do not need a mutual connection between two virtual networks and want only one virtual network to be accessible from the other.
Consider the following example:
The virtual machine VM1 is connected to the virtual network private1 (192.168.128.0/24) via the network interface with IP address 192.168.128.10.
The virtual machine VM2 is connected to the virtual network private2 (192.168.30.0/24) via the network interface with IP address 192.168.30.10.
The router router1 connects the network private1 to the physical network via the external gateway with the IP address 10.94.129.73.
The router router2 connects the network private2 to the physical network via the external gateway with the IP address 10.94.129.74.
To be able to access VM2 from VM1, you need to add a static route for router1, specifying the CIDR of private2, that is 192.168.30.0/24, as the destination subnet and the external gateway IP address of router2, that is 10.94.129.74, as the next hop IP address. In this case, when an IP packet for 192.168.30.10 reaches router1, it will be forwarded to router2 and then to VM2.
You have a virtual router created, as described in .
To create a static route for a router
On the Routers screen, click the router name. Open the Static routes tab, and then click Add on the right pane. If there are no routes to show, click Add static route.
In the Add static route window, specify the destination subnet range and mask in CIDR notation and the next hop’s IP address. The next hop’s IP address must belong to one of the networks that the router is connected to.
Click Add.
Click the ellipsis icon next to the required static route, and then click Edit.
In the Edit static route window, change the desired parameters, and then click Save.
Click the ellipsis icon next to the static route you want to remove, and then click Delete.
You can attach ISO images to running or stopped virtual machines, for example, to install additional software inside them or to restore their operating system in the rescue mode. To attach an ISO image, you need to convert it to a volume, and then attach this volume to a VM.
When you finish installing software from an ISO volume, you can detach it without stopping the VM first.
To create a volume from an ISO image
On the Images screen, click the required ISO image.
On the image right pane, click Create volume.
Once you create a virtual machine, you can manage its CPU and RAM resources, as well as network interfaces and volumes.
Prerequisites
Virtual machines are created, as described in .
Prerequisites
Virtual machines are created, as described in .
To manage the power state of a virtual machine
Click the virtual machine or the ellipsis button next to it to see the full list of actions available for the current state.
To power up a VM, click Run.
Bamboozle Kubernetes is a managed Kubernetes service lets you deploy scalable and secure Kubernetes clusters without the complexities.
Bamboozle Kubernetes is a managed Kubernetes service lets you deploy scalable and secure Kubernetes clusters without the complexities of administrating the control plane. We manage the Kubernetes control plane and the underlying containerized infrastructure.
Clusters are compatible with standard Kubernetes toolchains and integrate natively with our Load Balancers and block storage volumes.
There are no restrictions on the API objects you can create as long as the underlying Kubernetes version supports them. We offer the latest version of Kubernetes as well as earlier patch levels of the latest minor version for special use cases. You can also install popular tools like Helm, metrics-server, and Istio.
A volume in Bamboozle Cloud (Public and Private) is a virtual disk drive that can be attached to a virtual machine. The integrity of data in volumes is protected by the redundancy mode specified in the storage policy.
Virtual routers provide L3 services such as routing and Source Network Address Translation (SNAT) between virtual and physical networks, or different virtual networks:
A virtual router between virtual and physical networks provides access to public networks, such as the Internet, for VMs connected to this virtual network.
A virtual router between different virtual networks provides network communication for VMs connected to these virtual networks.
A virtual router has two types of ports:
Once you register in our portal an activation link is sent to the email provided in the system. Please follow the steps to activate your account.
Activate account button. Click the button and set the password for your account. Ensure that your password is at least nine characters long. For more information about the password, refer to .
If your administrator has enabled two-factor authentication, you will be prompted to set it up for your account. For more information about it, refer to .
The console log of a virtual machine can be used for troubleshooting boot issues. The log contains messages only if logging is enabled inside the VM, otherwise the log is empty.
The logging can be turned on by enabling the TTY1 and TTYS0 logging levels in Linux VMs and Emergency Management Services (EMS) console redirection in Windows VMs. You may also enable driver status logging in Windows VMs, to see the list of loaded drivers. This can be useful for troubleshooting a faulty driver or long boot process.
Limitations
You can only attach and detach non-boot volumes.
Prerequisites
A volume is created, as described in .
Before you install an agent, you must download its installation file from the service console.
To download an agent while adding a workload to protect
In the Cyber Protection console, navigate to Devices > All devices.
In the upper right, click Add device.
Sign up for an Instance in our Portal
Choose your package
Click the Activate button and confirm with Yes, activate. Deploying an Object Storage instance takes a few minutes.
5 TB Outbound Traffic included. Per organization-account 5 TB of in and outbound traffic per month is included. Internal traffic is always free.
Usage over the 5TB limit is calculated per GB usage.
After you activate your account, you can access the Cyber Protection service by logging in to the Cyber Protection console or via the management portal.
To log in to the Cyber Protection console
Go to the Cyber Protection service login .
Type your login, and then click Next.
You can unbind a stopped VM from the node it is hosted on and release its reserved resources such as CPU and RAM. A shelved VM remains bootable and retains its configuration, including the IP addresses.
Prerequisites
Virtual machines are created, as described in .
To shelve a virtual machine
Click the desired virtual machine.
This section explains how to install and uninstall the guest tools. This functionality is required for creating consistent snapshots of a running VM’s disks.
Limitations
Guest tools rely on the QEMU guest agent that is installed alongside the tools. The agent service must be running for the tools to work.
Prerequisites
Virtual machines are created, as described in .
You can forcefully re-initiate a VPN connection by manually restarting it. When you delete a VPN connection, you also delete the IKE and IPsec policies and endpoint groups that were created during the VPN creation.
Prerequisites
A VPN connection is created, as described in .
To restart a VPN connection
On the VPN screen, click a VPN connection to restart.
In the Create volume from image window, specify a name for the volume, and then click Create.
To attach an ISO volume to a virtual machine
On the Virtual machines screen, click the required VM.
On the Overview tab, click the pencil icon in the Volumes field.
In the Volumes window, click Attach.
In the Attach volume window, select the created volume, and then click Attach. The attached volume will be marked as ISO.
In the Volumes window, click Done to save your changes.
The attached volume will appear inside the VM operating system.
To detach an ISO volume from a virtual machine
On the Virtual machines screen, click the required VM.
On the Overview tab, click the pencil icon in the Volumes field.
In the Volumes window, click the ellipsis icon next to the ISO volume, and then click Force detach.
Click Done to save your changes.
On the Security groups screen, click the required security group.
On the group right pane, navigate to the Assigned VMs tab. All the assigned virtual machines will be shown along with their status.
You can click the VM name to go to the VM Overview pane and change the security group assignment for its network interfaces.
On the Virtual machines screen, click the required virtual machine.
On the Overview tab, click the pencil icon in the Networks section.
Click the ellipsis icon next to the network interface to assign a security group to, and then click Edit.
In the Edit network interface window, go to the Security groups tab.
Select one or more security groups from the drop-down list, and then click Save.
The rules from chosen security groups will be applied at runtime.
You can persist data in Kubernetes clusters to block storage volumes using the Flow CSI plugin, the CSI Plugin is already preinstalled and is used for the default storage class. You can also persist data to Flow object storage by using the S3 API to interact with the storage from your application.
The Flow Kubernetes Cloud Controller supports provisioning external Load Balancers.
Clusters are added to a VPC network for the datacenter region by default. This keeps traffic between clusters and other applicable resources from being routed outside the datacenter over the public internet.
The cost of a Kubernetes cluster is based on the cluster’s resources:
Nodes (Workers and Master / Control plane ) are built on Instances.
Integration Load Balancers is charged at the same rate as common Load Balancers.
Integration with block storage volumes is charged at the same rate as volumes.
All charges for Kubernetes clusters appear in the Kubernetes detail view section. For pricing details please consult our pricing page.
Kubernetes Clusters are available in all regions. They are region-specific resources and can only be assigned within the same region.
At the moment IPv6 is not supported.
The control plane is not highly available and may be temporarily unavailable during upgrades or maintenance. This does not affect running clusters and does not make the cluster workers or workloads unavailable if external load balancers are used.
An internal port that is connected to a virtual network.
With virtual routers, you can do the following:
Create virtual routers
Change external or internal router interfaces
Create, edit, and delete static routes
Change a router name
Delete a router
A router can only connect networks that have IP management enabled.
You can delete a virtual router if no floating IP addresses are associated with any network it is connected to.
Compute networks are created, as described in Managing virtual networks.
The compute networks that are to be connected to a router have a gateway specified.
Navigate to the Routers screen, and then click Add router.
In the Add router window:
Specify a router name.
From the Network drop-down menu, select a physical network through which external access will be provided via an external gateway. The new external gateway will pick an unused IP address from the selected physical network.
In the Add internal interfaces section, select one or more virtual networks to connect to a router via internal interfaces. The new internal interfaces will attempt to use the gateway IP address of the selected virtual networks by default.
Select or deselect the SNAT check box to enable or disable SNAT on the external gateway of the router. With SNAT enabled, the router replaces VM private IP addresses with the public IP address of its external gateway.
Click Create.
Previous release - download the agent version from the previous release.
Current - download the latest available agent version.
Select the agent that corresponds to the operating system of the workload that you are adding.
The Save As dialog opens.
[Only for Macs with Apple silicon (such as Apple M1) processors] Click Cancel. In the Add Mac panel that opens, click the Download ARM installer link.
Select a location to save the agent installation file and click Save.
To download an agent for later use
In the upper right corner of the Cyber Protection console, click the User icon.
Click Downloads.
In the Downloads dialog, from the Release channel drop-down menu, select an agent version.
Previous release - download the agent version from the previous release.
Current - download the latest available agent version.
Scroll the list of available installers to locate the agent installer that you need and click the download icon at the end of its row.
The Save As dialog opens.
Select a location to save the agent installation file and click Save.
Once the instance is created, follow the on how to access it.
SOC 1 Type II
SOC 2 Type II
ISO 27001
PCI DSS
ISO 45001
ISO 9001:2015
ISO 22301
ISO 14001
ISO 50001
SOC 1 Type II
SOC 2 Type II
ISO 27001
PCI DSS
ISO 45001
ISO 9001:2015
ISO 22301
ISO 14001
ISO 50001
SOC 1 Type II
SOC 2 Type II
ISO 27001
PCI DSS
ISO 45001
ISO 9001:2015
ISO 22301
ISO 14001
ISO 50001
Snapshots are always associated with Volumes. As Snapshots are 1:1 block storage level copies of a Volume, the per GB pricing and the method of calculation are exactly the same. Charges accrue hourly for as long as the Snapshot exists.
1 GB
If you already have an external gateway, remove the existing one first.
On the Routers screen, click the router name. Open the Interfaces tab to view the list of its interfaces.
Click Add on the toolbar, or click Add interface if there are no interfaces to show.
In the Add interface window, do the following:
Select External gateway.
From the Network drop-down menu, select a physical network to connect to the router. The new interface will pick an unused IP address from the selected physical network. You can also provide a specific IP address from the selected physical network to assign to the interface in the IP address field.
Select or deselect the SNAT check box to enable or disable SNAT on the external gateway of the router. With SNAT enabled, the router replaces VM private IP addresses with the public IP address of its external gateway.
Click Add.
On the Routers screen, click the router name to open the list of its interfaces.
Click Add.
In the Add interface window, select a network to connect to the router from the Network drop-down menu. The new interface will attempt to use the gateway IP address of the selected virtual network by default. If it is in use, specify an unused IP address from the selected virtual network to assign to the interface in the IP address field.
Click Add.
Click the ellipsis icon next to the external interface, and then click Edit.
In the Edit interface window, change the IP address or configure SNAT.
Click Save to save your changes.
Select the interface you want to remove.
Click the ellipsis icon next to it, and then click Delete.
In the confirmation window, click Delete.
To gracefully shut down a running VM, click Shut down. The default shutdown timeout, after which a virtual machine will be powered off, is 10 minutes.
To forcibly cut off power from a VM, click Power off.
To softly reboot a running VM, click Reboot.
To reboot a VM without the guest OS graceful shutdown, click Hard reboot.
To save the current VM state to a file, click Suspend. This may prove useful, for example, if you need to restart the host but do not want to quit the applications currently running in the VM or restart its guest OS.
To restore a VM from the suspended state, click Resume.
If the VM is stopped, click Shelve on its right pane.
If the VM is running or suspended, click Shut down or Power off on its right pane, and then select Shelve virtual machine in the confirmation window.
To spawn a shelved VM on a node with enough resources to host it
Click a shelved virtual machine.
On the VM right pane, click Unshelve.
The virtual machine has a guest operating system installed.
On the connection right pane, click Restart.
Click Restart VPN in the confirmation window.
To delete a VPN connection
On the VPN screen, click a VPN connection to delete.
On the connection right pane, click Delete.
Click Delete in the confirmation window.


After you or we initiate a refund, our Payment Processor submits refund requests to your customer’s bank or card issuer. You will see the refund as a credit approximately 5-10 business days later, depending upon the bank. If you do not see the refund in the mentioned time following in your account following can be the reason:
Refunds issued shortly after the original charge appear in the form of a reversal instead of a refund. In the case of a reversal, the original charge drops off theyour statement, and a separate credit is not issued.
Refunds can fail if the customer’s bank or card issuer has been unable to process it correctly. The bank returns the refunded amount to us and we add it back to your account balance. This process can take up to 30 days from requesting the refund.
In a case where you do not see your refund in the mentioned timeline and the above points do not apply, we can provide you the Acquirer Reference Number (ARN) corresponding to the refund. An ARN is a unique number assigned to a card transaction as it moves through the payment flow. You can then take the ARN to your bank, which will be able to provide more information about when the refund will be available. ARNs are available under the following conditions:
They’re only supported for Visa and Mastercard transactions.
It takes 1-3 business days after initiating the refund to receive the ARN from downstream banking partners.
An ARN isn’t available in the case of a reversal, since the original charge isn’t processed.
If you have further question please open a support ticket with us.
The password for a user account must be at least 9 characters long. Passwords are also checked for complexity, and fall into one of the following categories:
Weak
Medium
Strong
You cannot save a weak password, even though it might contain 9 characters or more. Passwords that repeat the user name, the login, the user email, or the name of the tenant to which a user account belongs are always considered weak. Most common passwords are also considered weak.
To strengthen a password, add more characters to it. Using different types of characters, such as digits, uppercase and lowercase letters, and special characters, is not mandatory but it results in stronger passwords that are also shorter.
Add the line GRUB_CMDLINE_LINUX_DEFAULT="console=tty1 console=ttyS0" to the file /etc/default/grub.
Depending on the boot loader, run either
or
Reboot the VM.
Start Windows PowerShell by using administrator privileges.
In the PowerShell console, set the COM port and baud rate for EMS console redirection. As Windows VMs have only the COM1 port with the transmission rate of 9600 bps, run:
Enable EMS for the current boot entry:
Start System Configuration by using administrator privileges.
In the System Configuration windows, open the Boot tab, and select the check boxes OS boot information and Make all boot settings permanent.
Confirm the changes and restart the system.
# grub-mkconfig -o /boot/grub/grub.cfg# grub2-mkconfig -o /boot/grub2/grub.cfgbcdedit /emssettings EMSPORT:1bcdedit /ems onA volume is created, as described in Creating and deleting volumes.
On the Volumes screen, click a volume.
On the volume right pane, click Clone.
In the Clone volume window, specify a volume name, size, and storage policy. Click Clone.
To attach a volume to a virtual machine
On the Volumes screen, click an unused volume.
On the volume right pane, click Attach.
In the Attach volume window, select the VM from the drop-down list, and then click Done.
To detach a volume from a virtual machine
On the Volumes screen, click a volume that is in use.
If the VM is stopped, click Detach on the volume right pane.
If the VM is running, click Force detach on the volume right pane.
There is a risk of data loss.
[If you use more than one Cyber Protect Cloud service] Click Cyber Protection.
Users who only have access the Cyber Protection service, log in directly to the Cyber Protection console.
If Cyber Protection is not the only service you have access to, you can switch between the services by using the icon in the upper-right corner. Administrators can also use this icon for switching to the management portal.
The timeout period for the Cyber Protection console is 24 hours for active sessions and 1 hour for idle sessions.
You can change the language of the web interface by clicking the account icon in the upper-right corner.
To access the Cyber Protection console via the management portal
In the management portal, go to Monitoring > Usage.
Under Cyber Protect, select Protection, and then click Manage service.
Alternatively, under Clients, select a customer, and then click Manage service.
As a result, you are redirected to the Cyber Protection console.
To reset your password
Go to the Cyber Protection service login page.
Type your login, and then click Next.
Click Forgot password?
Confirm that you want further instructions by clicking Send.
Follow the instructions in the email that you have received.
Set up your new password.
You can delete a compute network only if no VMs are connected to it.
On the Networks screen, click Create virtual network.
On the Network configuration step, do the following:
Enable or disable IP address management:
On the Networks screen, click the required network.
On the network right pane, click the pencil icon next to the network name or IPv4 subnet.
Make changes and save them.
To delete a compute network
Click the ellipsis icon next to the required network, and then click Delete. To remove multiple compute networks at once, select them, and then click Delete.
You can add new network interfaces to your virtual machines, edit IP addresses and security groups for the existing interfaces, and remove network interfaces by detaching them.
Limitations
You cannot manage network interfaces of shelved VMs.
A VM that is connected to a dual-stack network always receives an IPv6 address, if the IPv6 subnet is in the SLAAC or DHCPv6 stateless mode.
To attach a network interface to a virtual machine
On the Virtual machines screen, click the required virtual machine.
On the Overview tab, click Edit in the Network interfaces section.
In the Network interfaces window, click Add to attach a network interface.
In the Add network interface window, select a compute network to connect to, and then specify MAC address, IPv4 and/or IPv6 addresses, and security groups. By default, MAC and primary IP addresses are assigned automatically. To specify them manually, clear the Assign automatically check boxes, and enter the desired addresses. Optionally, assign additional IP addresses to the network interface in the Secondary IP addresses section. Note that a secondary IPv6 address is not available for an IPv6 subnet that works in the SLAAC or DHCPv6 stateless mode.
Secondary IP addresses, unlike the primary one, will not be automatically assigned to the network interface inside the virtual machine guest OS. You should assign them manually.
If you selected a virtual network with enabled IP address management
Click Done to finish editing VM network interfaces and save your changes.
To edit a network interface of a virtual machine
On the Virtual machines screen, click the required virtual machine.
On the Overview tab, click Edit in the Network interfaces section.
In the Network interfaces window, click the ellipsis button next to the interface you want to edit, and then click Edit.
In the Edit network interface window, modify the network interface parameters as follows:
To detach a network interface from a virtual machine
On the Virtual machines screen, click the required virtual machine.
On the Overview tab, click Edit in the Network interfaces section.
In the Network interfaces window, click the ellipsis button next to the interface you want to detach, and then click Remove.
Click Done to finish editing VM network interfaces and save your changes.
Bamboozle Object Storage is an S3-compatible object storage service that lets you store and serve large amounts of data. The Bamboozle Object Storage API is inter-operable with the AWS S3 API, meaning you can use existing S3 tools and libraries with Spaces. A common use case is managing Bamboozle Object Storage programmatically with AWS’ S3 SDKs.
Install the AWS SDK using the package manager for your language of choice.
You are able to retrieve the access & secret keys in our customer portal:.
The examples below rely on environment variables to access these keys. Export ACCESS_KEY and SECRET_KEY to your environment (e.g. export ACCESS_KEY=DSJE2334BBZ) to make them available to your code.
After you set up and configure an SDK, you can follow the examples below to see how to perform common Bamboozle Object Storage operations in JavaScript, Go, PHP, Python and Ruby.
You can change volume size only by increasing it. Volumes can be extended for both running (online resizing) and stopped (offline resizing) virtual machines. Online volume resizing allows users to avoid downtime and enables scaling VM storage capacity on the fly without service interruption.
You cannot shrink volumes.
During volume resizing, the file system inside the guest OS is not extended.
If you revert a volume to a snapshot that was taken before the volume extension, the new volume size will be retained.
A volume is created, as described in .
On the Volumes screen, click a volume.
Click the pencil icon in the Size field.
Enter the desired volume capacity, and then click the tick icon.
After the volume is extended, you will need to re-partition the disk inside the guest OS to allocate the added disk space.
To access Flow Object Storage with Cyberduck, please follow these steps:
Download (https://cyberduck.io) and install Cyberduck
Open CyberDuck and click Open Connection.
Specify your the credentials which are provided in our customer portal (https://portal.bamboozle.me):
Server: Insert the DNS name of the S3 endpoint (Your location is mentioned in your account in our portal): Location Dubai: dxb.bbzs3.com
Access Key ID: Insert the displayed Access Key from our portal.
Secret Access Key ID: Insert the displayed Secret Key from our portal.
Press the connect button
Example for DXB:
Cyber Protect represents an all-in-one cyber protection solution that integrates backup and recovery, disaster recovery, malware prevention, security controls, remote assistance, monitoring, and reporting.
It protects your entire business and businesses of your customers through layered protection approach, an innovative combination of proactive, active, and reactive data protection technologies:
Proactive actions, such as vulnerability assessment/patch management, predictive analysis of hard drive health based on machine learning technologies, allow you to prevent any threats to your machines.
Active actions, such as protection against malware, self-protection, allow you to detect threats.
Reactive actions, such as backup and recovery (on-premises and cloud), disaster recovery (on-premises and cloud), allow you to respond to any failures.
Cyber Protect provides you with one protection agent, one service console that is easy to manage, and one protection plan that covers all security and data protection aspects.
Cyber Protect provides the following functionality:
Backup and recovery allows you to back up and recover physical machines, virtual machines, and applications.
Disaster recovery allows you to protect your local environment from disasters by launching the exact copies of machines in the cloud and switching the workload to the cloud servers.
Antimalware and web protection provides you with the top multi-layered protection based on four different antimalware technologies inside. You will also be able to manage Microsoft Security Essentials and Windows Defender Antivirus from the service console. The URL filtering functionality allows you to prevent malicious file download and block access to suspicious web resources.
Cyber Protection has the following unique features:
Backup scanning in non-endpoint environments that ensures malware-free restores. It increases the potential of rootkits and bootkits detection and reduces loads on your machines.
Safe recovery based on integrated antimalware scanning and malware deletion to prevent recurrence of an infection.
Smart protection built on the basis of alarms received from Cyber Protection Operations Center (CPOC). This feature allows you to minimize business process downtime when facing issues like a malware attack, natural disaster, to reduce reaction time, and to avoid data loss.
To enable all features from the remote desktop functionality on macOS workloads, in addition to the full disk access permission, you must grant the following permissions to the Connect Agent:
Screen Recording - enables screen recording of the macOS workload via NEAR. Until this permission is granted, all remote control connections will be denied.
Accessibility - enables remote connections in control mode via NEAR
Microphone - enables sound redirection from the remote macOS workload to the local workload via NEAR. To enable the sound redirection feature, a sound capture driver must be installed on the workload. For more information, see .
Automation - enables the empty Recycle bin action
After you start the agent on the macOS workload, it will check if the agent has these rights and will ask you to grant the permissions, if needed.
To grant the Screen Recording permission
In the Grant required system permissions for Cyber Protect Agent dialog, click Set up system permissions.
In the System permissions dialog, click Request Screen Recording permission.
Click Open System Preferences.
Select Connect Agent.
If the agent does not have the permission when you try to access the workload remotely, it will show the Screen Recording permission request dialog. Only the local user may answer the dialog.
To grant the Accessibility permission
In the Grant required system permissions for Cyber Protect Agent dialog, click Set up system permissions.
In the System permissions dialog, click Request Accessibility permission.
Click Open System Preferences.
Click the lock icon in the bottom-left corner of the window so that it changes to an unlocked one. The system will ask you for an administrator password to make changes.
To grant the Microphone permission
In the Grant required system permissions for the Connect Agent dialog, click Set up system permissions.
In the System permissions dialog, click Request Microphone permission.
Click OK.
You must also install a sound capture driver on the macOS workload to let the agent utilize the given permission and redirect the sound of the workload. For more information, see Remote sound redirection.
To grant the Automation permission
In the Grant required system permissions for the Connect Agent dialog, click Set up system permissions.
In the System permissions dialog, click Request Automation permission.
You have a virtual router created, as described in Managing virtual routers.
The virtual router connects the physical network with virtual networks that you want to be exposed.
Networks that will be connected via a VPN tunnel must have non-overlapping IP ranges.
[For Virtuozzo Hybrid Infrastructure 5.4 Update 1 and earlier versions] If a virtual machine has a floating IP address assigned to its private network interface, configure static routes of a virtual router, for the VM traffic to be routed through a VPN tunnel.
On the VPN screen, click Create VPN.
On the Configure IKE step, specify parameters for the IKE policy that will be used to establish a VPN connection. You can choose to use an existing IKE policy or create a new one. For the new IKE policy, do the following:
Specify a custom name for the IKE policy.
Specify the key lifetime, in seconds, that will define the rekeying interval. The IKE key lifetime must be greater than that of the IPsec key.
When the VPN connection is created, its status will change from "Pending creation" to "Down". The connection will become active once the VPN tunnel is configured by the other VPN party and the IKE authorization is successful.
The IKE and IPsec configuration must match for both communicating parties. Otherwise, the VPN connection between them will not be established.
Virtuozzo Hybrid Infrastructure allows you to upload ISO images and templates that can be used to create VM volumes:
Please note a lot of templates are already installed and ready to be deployed right away. Check first if a OS Image is already available before creating a new one.
An ISO image is a typical OS distribution that needs to be installed on disk. You can upload an ISO image to the compute cluster.
A template is a ready boot volume in the QCOW2 format with an installed operating system and applications. Many OS vendors offer templates of their operating systems under the name “cloud images”. You can upload a cloud image from the OS official repository or prepare your own template in the compute cluster.
Knowledge of the supported guest operating systems listed in .
With Virtual Private Network (VPN) as a service, users can extend virtual networks across public networks, such as the Internet. To connect two or more remote endpoints, VPNs use virtual connections tunneled through physical networks. To secure VPN communication, the traffic that flows between remote endpoints is encrypted. The VPN implementation uses the Internet Key Exchange (IKE) and IP Security (IPsec) protocols to establish secure VPN connections and is based on the strongSwan IPsec solution.
VPN as a service can be used to establish a Site-to-Site VPN connection between a virtual network configured in Bamboozle Cloud and any other network with a VPN gateway that uses the IPsec and IKE protocols. With VPN as a service, you can connect the following workloads:
On-premises workloads with workloads hosted in Bamboozle Cloud
Workloads hosted in other clouds with workloads hosted in Bamboozle Cloud
Workloads hosted in different Bamboozle Cloud Locations
To better understand how a VPN works, consider the following example:
In the cluster 1, the virtual machine VM1 is connected to the virtual network privnet1 (192.168.10.0/24) via the network interface with IP address 192.168.10.10. The network privnet1 is exposed to public networks via the router router1 with the external port 10.10.10.5.
In the cluster 2, the virtual machine VM2 is connected to the virtual network privnet2 (192.168.20.0/24) via the network interface with IP address 192.168.20.20. The network privnet2 is exposed to public networks via the router router2 with the external port 10.10.10.4.
The VPN tunnel is created between the routers router1 and router2 that serve as VPN gateways, thus allowing mutual connectivity between the networks privnet1 and privnet2.
For key exchange between communicating parties, two IKE versions are available: IKE version 1 (IKEv1) and IKE version 2 (IKEv2). IKEv2 is the latest version of the IKE protocol and it supports connecting multiple remote subnets.
In the example above:
VPN1 uses the IKEv1 and connects the network network1 with the network3.
VPN2 uses the IKEv2 and connects the network network2 with the two networks network4 and network5.
Currently, we support only Site-to-Site VPN connections. Point-to-Site VPN connections are not supported.
After a VPN connection is created, you can change its endpoint groups and VPN settings at any time.
You cannot change the virtual router and security policies used to establish a VPN connection.
A VPN connection is created, as described in .
To edit a VPN connection
On the VPN screen, click a VPN connection to modify.
On the connection right pane, click Edit.
In the Edit VPN window, configure local and remote endpoints, if required, and then click Next.
On the next step, change VPN parameters such as the VPN connection name, peer IP address, and PSK key. If necessary, you can also configure additional settings by selecting Advanced settings and editing the required parameters.
After you update the connection parameters, its status will change to "Down". The connection will re-initiate once the parameters are similarly updated by the other VPN party.
The IKE and IPsec configuration must match for both communicating parties. Otherwise, the VPN connection between them will not be established.
To create multiple VMs with the same boot volume, you can create a template from an existing boot volume and deploy VMs from it.
Linux virtual machines have cloud-Init installed, as described in Preparing Linux templates.
Windows virtual machines have Cloudbase-Init and OpenSSH Server installed, as described in .
Logging is enabled inside a virtual machine, as instructed in .
Power off the VM that the original volume is attached to.
Switch to the Volumes screen, click volume’s ellipsis button and select Create image.
In the Create image window, enter an image name, and then click Create
The new image will appear on the Images screen.
You can add new volumes to your virtual machines, attach existing volumes, and detach unneeded volumes from virtual machines.
Limitations
You cannot change, detach, or delete the boot volume.
You can only attach and detach non-boot volumes.
On the Select components screen, define the account under which the services will run by specifying Logon account for the agent service. You can select one of the following:
Use Service User Accounts (default for the agent service)
Service User Accounts are Windows system accounts that are used to run services. The advantage of this setting is that the domain security policies do not affect these accounts' user rights. By default, the agent runs under the Local System account.
Create a new account
The account name will be Agent User for the agent.
Create a compute volume from the vz-guest-tools-win or vz-guest-tools-lin image, depending on the VM operating system:
On the Images screen, click the vz-guest-tools-win or vz-guest-tools-lin image.
On the image right pane, click Create volume.
You can save the current state of a VM file system or user data by creating a snapshot of a volume. A snapshot of a boot volume may be useful, for example, before updating VM software. If anything goes wrong, you will be able to revert the VM to a working state at any time. A snapshot of a data volume can be used for backing up user data and testing purposes.
To create a consistent snapshot of a running VM’s volume, the guest tools must be installed in the VM, as described in . The QEMU guest agent included in the guest tools image automatically quiesces the filesystem during snapshotting.
If you find out that the guest tools are incompatible with some software inside a virtual machine, you can uninstall them by doing the following:
Inside a Windows VM:
Remove the QEMU device drivers from the device manager.
Do not remove the VirtIO/SCSI hard disk driver and NetKVM network driver. Without the former, the VM will not boot; without the latter, the VM will lose network connectivity.
If a virtual machine fails to deploy
Review the error message on the VM right pane. One of the possible root causes is that compute nodes lack free RAM or CPU resources to host the VM.
If a virtual machine is in the error state
Examine the VM history in the History tab on the VM right pane. The event log will contain all of the VM management operations performed by users in the user or command-line interface. You can expand each log entry to view operation details by clicking the arrow icon next to it. The details include the operation name, date and time, status, initiator, and request ID.
If a virtual machine is stuck in a failed or transitional state
Reset the VM to its last stable state: active, shut down or shelved:
If you selected a shared physical network
After specifying the network interface parameters, click Add.
Change the primary IP address. To update the address inside the VM guest OS, restart the network interface.
Add or remove secondary IP addresses.
Modify security groups assigned to the VM.
After updating the required parameters, click Save.
Click Done to finish editing VM network interfaces and save your changes.
Autodiscovery of machines provides you with an easy and automatic way to register a large number of machines and install a protection agent and additional components.
Vulnerability assessment allows you to scan Microsoft, Linux, macOS, Microsoft third-party products, and macOS third-party products for vulnerabilities.
Patch management integrated with backup provides you with the following capabilities: automatic and manual patch approval, scheduled and on-demand patch installation, flexible reboot and maintenance window options, staged deployment.
Hard drive health control allows you to track the status of hard disks and prevent their crash. Disk control uses a combination of machine learning and SMART reporting to predict disk failures.
Remote management and assistance allows you to connect and manage machines remotely.
#CyberFit Score provides you with a security assessment and scoring mechanism that evaluates the security posture of your machine.
Device control enables you to limit the user access to local and redirected peripheral devices, ports, and clipboard on machines under protection plans.
Continuous data protection that ensures that you will not lose your data changes made between scheduled backups. You can control what will be continuously backed up – Office documents, financial forms, graphic files, and so on. You get improved RPOs due to continuous backups.
A data protection map that ensures tracking data distribution across the machines, monitoring the protection status of files, and using the collected data as the basis for compliance reports.
Forensic backup that allows you to collect digital evidence data, include them in a disk-level backup, and use them for future investigations.
Company-wide allowlist built on backups that allows you to prevent false detections. This feature eliminates time-consuming manual listing of trusted corporate applications, ensures greater productivity, and improves the detection rate by using improved heuristics.
Select the authentication algorithm that will be used to verify the data integrity and authenticity.
Select the encryption algorithm that will be used to ensure that data is not viewable while in transit.
Select the IKE version 1 or 2. Version 1 has limitations, for example, it does not support multiple subnets.
Select the Diffie-Hellman (DH) group that will be used to build the encryption key for the key exchange process. Higher group numbers are more secure but require additional time for the key to compute.
Click Next.
On the Configure IPsec step, specify parameters for the IPsec policy that will be used to encrypt the VPN traffic. You can choose to use an existing IPsec policy or create a new one. For the new IPsec policy, do the following:
Specify a custom name for the IPsec policy.
Specify the key lifetime, in seconds, that will define the rekeying interval. The IPsec key lifetime must not be greater than that of the IKE key.
Select the authentication algorithm that will be used to verify the data integrity and authenticity.
Select the encryption algorithm that will be used to ensure that data is not viewable while in transit.
Select the Diffie-Hellman (DH) group that will be used to build the encryption key for the key exchange process. Higher group numbers are more secure but require additional time for the key to compute.
Click Next.
On the Create endpoint groups step, select a virtual router and specify local and remote subnets that will be connected by the VPN tunnel. You can choose to use existing local and remote endpoints, or create new ones. For the new endpoints, do the following:
Specify a custom name for the local endpoint, and then select local subnets.
Specify a custom name for the remote endpoint, and then add remote subnets in the CIDR format.
Click Next.
On the Configure VPN step, specify parameters to establish the VPN connection with a remote gateway:
Specify a custom name for the VPN connection.
Specify the public IPv4 address of the remote gateway, that is, peer IP address.
Generate the pre-shared key that will be used for the peer authentication.
If necessary, you can also configure additional settings by selecting Advanced settings and specifying the following parameters:
The peer ID for authentication and the mode for establishing a connection.
The Dead Peer Detection (DPD) policy, interval, and timeout, in seconds.
Click Next.
On the Summary step, review the configuration, and then click Create.
Prerequisites
To be able to use volumes attached to VMs, they must be initialized inside the guest OS by standard means.
To attach a volume to a virtual machine
On the Virtual machines screen, click the required virtual machine.
On the Overview tab, click the pencil icon in the Disks field.
In the Volumes window:
Click Attach to attach an existing volume, and then select the volume in the Attach volume window.
Click Add to create a new volume, and then specify the volume name, size, and storage policy. The created volume will be automatically added to the VM disks.
Click Done to finish editing VM disks and save your changes.
To detach a volume from a virtual machine
On the Virtual machines screen, click the required virtual machine.
On the Overview tab, click the pencil icon in the Disks field.
In the Volumes window:
Click Detach to detach a volume from a stopped virtual machine.
Click Force detach to detach a volume from a running virtual machine.
There is a risk of data loss.
Click Done to finish editing VM disks and save your changes.
Youhave enough resources for all of the Kubernetes nodes, taking their flavors into account.
It is also required that the network where you create a Kubernetes cluster does not overlap with these default networks:
10.100.0.0/24—Used for pod-level networking
10.254.0.0/16—Used for allocating Kubernetes cluster IP addresses
Go to the Kubernetes clusters screen, and then click Create on the right. A window will open where you can set your cluster parameters
Enter the cluster name, and then select a Kubernetes version and an SSH key.
In the Network section, select a network that will interconnect the Kubernetes nodes in the cluster. If you select a virtual network, decide whether you need access to your Kubernetes cluster via a floating IP address:
If you select None, you will not have access to the Kubernetes API.
If you select For Kubernetes API, a floating IP address will be assigned to the master node or to the load balancer if the master node is highly available.
If you select For Kubernetes API and nodes, floating IP addresses will be additionally assigned to all of the Kubernetes nodes (masters and workers).
Then, choose whether or not to enable High availability for the master node. If you enable high availability, three master node instances will be created. They will work in the Active/Active mode.
In the Master node section, select a flavor for the master node. For production clusters, it is strongly recommended to use a flavor with at least 2 vCPUs and 8 GiB of RAM.
Optionally, enable Integrated monitoring to automatically deploy the cluster-wide monitoring solution, which includes the following components: Prometheus, Alertmanager, and Grafana.
** This feature is experimental and not supported in production environments. **
In the Container volume section, select a storage policy, and then enter the size for volumes on both master and worker nodes.
In the Default worker group section, select a flavor for each worker, and then decide whether you want to allow automatic scaling of the worker group:
With Autoscaling enabled, the number of workers will be automatically increased if there are pods stuck in the pending state due to insufficient resources, and reduced if there are workers with no pods running on them. For scaling of the worker group, set its minimum and maximum size.
With Autoscaling disabled, the number of worker nodes that you set will be permanent.
In the Labels section, enter labels that will be used to specify supplementary parameters for this Kubernetes cluster in the key=value format. For example: selinux_mode=permissive. Currently, only the selinux label is supported. You can use other labels at your own risk. To see the full list of supported labels, refer to the OpenStack documentation.
Click Create.
Creation of the Kubernetes cluster will start. The master and worker nodes will appear on the Virtual machines screen, while their volumes will show up on the Volumes screen.
After the cluster is ready, click Kubernetes access for instructions on how you can access the dashboard. You can also access the Kubernetes master and worker nodes via SSH, by using the assigned SSH key and the user name core.
Click the required Kubernetes cluster on the Kubernetes clusters screen and click Delete. The master and worker VMs will be deleted along with their volumes.
On the VM right pane, click Reset state.
If a virtual machine fails to boot
Examine the VM console log by clicking Download console log on the VM right pane. The log will contain log messages only if logging is enabled inside the VM (refer to Enabling logging for virtual machines).
npm install aws-sdk go get -u github.com/aws/aws-sdk-gophp composer.phar require aws/aws-sdk-phppip install boto3gem install aws-sdk-s3Select Connect Agent.
Click Save to apply your changes.


1.3 GB
Agent for Data Loss Prevention
500 MB
Agent for Microsoft 365
500 MB
Agent for Active Directory and Agent for Windows
2 GB
Agent for VMware and Agent for Windows
1.5 GB
Agent for Hyper-V and Agent for Windows
1.5 GB
Agent for Virtuozzo and Agent for Linux
1 GB
Agent for Virtuozzo Hybrid Infrastructure
700 MB
Agent for Oracle and Agent for Windows
2.2 GB
Agent for Oracle and Agent for Linux
2 GB
Agent for MySQL/MariaDB and Agent for Linux
2 GB
Backup operations require about 1 GB of RAM per 1 TB of backup size. The memory consumption may vary, depending on the amount and type of data being processed by the agents.
On x64 systems, operations with bootable media and disk recovery with restart require at least 2 GB of memory.
Agent for Windows
1.2 GB
Agent for Linux
2 GB
Agent for Mac
1 GB
Agent for SQL and Agent for Windows
1.2 GB
Agent for Exchange and Agent for Windows
In the Create volume from image window, specify a name for the volume, and then click Create.
Attach the volume with the guest tools to the virtual machine:
On the Virtual machines screen, click the required VM.
On the VM right pane, click the pencil icon in the Volumes field.
In the Volumes window, click Attach.
In the Attach volume window, select the created volume with the guest tools, and then click Attach. The attached volume will be marked as ISO.
In the Volumes window, click Done, to save your changes.
Log in to the virtual machine.
Inside the VM, do the following:
Inside a Windows VM, go to the mounted optical drive in Explorer and install the guest tools by running setup.exe. After the installation is complete, restart the VM.
Inside a Linux VM, create a mount point for the optical drive with the guest tools image and run the installer:
# mkdir /mnt/cdrom
# mount <path_to_guest_tools_iso> /mnt/cdrom
# bash /mnt/cdrom/install
With IP address management disabled, VMs connected to the network will obtain IP addresses from the DHCP servers in that network, if any. Also, spoofing protection will be disabled for all VM network ports, and you cannot enable it manually. This means that each VM network interface, with or without assigned IP and MAC addresses, will be able to accept and send IP packets.
In any case, you will be able to manually assign static IP addresses from inside the VMs.
Specify a name, and then click Next.
If you enabled IP address management, you will move on to the IP address management step, where you can add an IPv4 subnet:
In the Subnets section, click Add and select IPv4 subnet.
In the Add IPv4 subnet window, specify the network’s IPv4 address range and, optionally, specify a gateway. If you leave the Gateway field blank, the gateway will be omitted from network settings.
Enable or disable the built-in DHCP server:
With the DHCP server enabled, VM network interfaces will automatically be assigned IP addresses: either from allocation pools or, if there are no pools, from the network’s entire IP range. The DHCP server will receive the first two IP addresses from the IP pool. For example:
In a subnet with CIDR 192.168.128.0/24 and without a gateway, the DHCP server will be assigned the IP addresses 192.168.128.1 and 192.168.128.2.
In a subnet with CIDR 192.168.128.0/24 and the gateway IP address set to 192.168.128.1, the DHCP server will be assigned the IP addresses 192.168.128.2 and 192.168.128.3.
The virtual DHCP service will work only within the current network and will not be exposed to other networks.
Specify one or more allocation pools (ranges of IP addresses that will be automatically assigned to VMs).
Specify DNS servers that will be used by virtual machines. These servers can be delivered to VMs via the built-in DHCP server or by using the cloud-init network configuration (if cloud-init is installed in the VM).
Click Add.
On the Summary step, review the configuration, and then click Create virtual network.
On the Security groups screen, click the security group to add a rule to.
On the group right pane, click Add in the Inbound or Outbound section to create a rule for incoming or outgoing traffic.
Specify the rule parameters:
Select a protocol from the list or enter a number from 0 to 255.
Enter a single port or a port range. Some protocols already have a predefined port range. For example, the port for SSH is 22.
Select a predefined subnet CIDR or an existing security group.
Click the check mark to save the changes.
As soon as the rule is created, it is applied to all of the virtual machines assigned to the security group.
On the Security groups screen, click the required security group.
On the group right pane, click the bin icon next to a rule you want to remove.
As soon as the rule is removed, this change is applied to all of the virtual machines assigned to the security group.
Use the following account
If you install the agent on a domain controller, the system prompts you to specify existing accounts (or the same account) for the agent. For security reasons, the system does not automatically create new accounts on a domain controller.
The user account that you specify when the setup program runs on a domain controller must be granted the Log on as a service right. This account must have already been used on the domain controller, in order for its profile folder to be created on that machine.
For more information about installing the agent on a read-only domain controller, refer to this knowledge base article.
If you chose the Create a new account or Use the following account option, ensure that the domain security policies do not affect the related accounts' rights. If an account is deprived of the user rights assigned during the installation, the component may work incorrectly or not work.
A protection agent is run as a Managed Machine Service (MMS) on a Windows machine. The account under which the agent will run must have specific rights for the agent to work correctly. Thus, the MMS user should be assigned the following privileges:
Included in the Backup Operators and Administrators groups. On a Domain Controller, the user must be included in the group Domain Admins.
Granted the Full Control permission on the folder %PROGRAMDATA%\Acronis (in Windows XP and Server 2003, %ALLUSERSPROFILE%\Application Data\Acronis) and on its subfolders.
Granted the Full Control permission on certain registry keys in the following key: HKEY_LOCAL_MACHINE\SOFTWARE\Acronis.
Assigned the following user rights:
Log on as a service
Adjust memory quotas for a process
Replace a process level token
Follow the instructions below to assign the user rights (this example uses the Log on as service user right, the steps are the same for other user rights):
Log on to the computer by using an account with administrative privileges.
Open Administrative Tools from Control Panel (or click Win+R, type control admintools, and press Enter) and open Local Security Policy.
Expand Local Policies and click on User Rights Assignment.
In the right pane, right-click Log on as a service and select Properties.
Click on the Add User or Group… button to add a new user.
In the Select Users, Computers, Service Accounts, or Groups window, find the user you wish to enter and click OK.
Click OK in the Log on as a service Properties to save the changes.
Ensure that the user which you have added to the Log on as service user right is not listed in the Deny log on as a service policy in Local Security Policy.
Note that it is not recommended to change logon accounts manually after the installation is completed.
Click Browse and select a file in one of the supported formats: .iso, .img, .qcow2, .raw.
Specify an image name to be shown in the admin panel.
Select the correct OS type from the drop-down list.
The OS type affects VM parameters such as hypervisor settings. VMs created from an image with an incorrect OS type may not work correctly, for example, they may crash
If you have chosen an image in the QCOW2, RAW, or IMG format, select the UEFI boot check box, to mark the image as UEFI bootable. This option cannot be configured after the image is uploaded.
Click Add to start uploading the image. The upload progress will be shown in the bottom right corner.
You can hide the pop-up window without interrupting the upload process. The upload progress will be available in the notification center.
On the Volumes screen, click a volume.
In the volume right pane, switch to Snapshots, and then click Create snapshot.
Select a volume and open the Snapshots tab on its right pane.
You can do the following:
Create a new volume from the snapshot.
Create a template from the snapshot.
Discard all changes that have been made to the volume since the snapshot was taken. This action is available only for VMs with the "Shut down" and "Shelved offloaded" statuses.
As each volume has only one snapshot branch, all snapshots created after the snapshot you are reverting to will be deleted. If you want to save a subsequent snapshot before reverting, create a volume or an image from it first.
Change the snapshot name and description.
Reset the snapshot stuck in an "Error" state or transitional state to the "Available" state.
Remove the snapshot.
To perform these actions, click the ellipsis button next to a snapshot, and then click the corresponding action.
Uninstall the QEMU guest agent and guest tools from the list of installed applications.
Stop and delete Guest Tools Monitor:
Unregister Guest Tools Monitor from Event Log:
Delete the autorun registry key for RebootNotifier:
Delete the C:\Program Files\Qemu-ga\ directory.
If VzGuestToolsMonitor.exe is locked, close all the Event Viewer windows. If it remains locked, restart the eventlog service:
After removing the guest tools, restart the virtual machine.
Inside a Linux VM:
Remove the packages:
On RPM-based systems (CentOS and other):
On DEB-based systems (Debian and Ubuntu):
If any of the packages listed above are not installed on your system, the command will fail. In this case, exclude these packages from the command and run it again.
Remove the files:
Reload the udev rules:
After removing guest tools, restart the virtual machine.
You can change amount of CPU and RAM resources used by a virtual machine by applying another flavor to it. To be able to resize a running VM, you need to enable CPU and RAM hot plug for it first. You can change the hot plug settings for both new and existing VMs.
A running virtual machine has a resize limit, which defines the maximum number of vCPUs and the maximum amount of RAM you can allocate to the VM. The resize limit on vCPUs is static and equal to 64 for all VMs. The resize limit on RAM, on the contrary, is dynamic and depends on the amount of RAM a running VM is currently using. This limit is updated on a VM startup, and its values are listed in the table below.
1-4
16
For example, you can resize a running VM with a flavor that has 16 GiB to a flavor with 256 GiB in two iterations:
Resize the VM to a flavor with 64 GiB.
Restart the VM to update the RAM size limit.
Resize the VM to a flavor with 256 GiB.
Limitations
You cannot change the flavor for shelved VMs. To resize such a VM, unshelve it first.
You cannot decrease the number of CPUs and the amount of RAM for running VMs.
[For all Linux guests] If a VM has no guest tools installed, new cores may be offline after CPU hot plugging
Prerequisites
Before changing a flavor, ensure that the node hosting the VM has at least as much free CPU and RAM resources as the new VM size. For example, to resize a VM to the large flavor, the host must have at least 4 vCPUs and 8 GiB of RAM free.
CPU and RAM hot plug is enabled by the system administrator.
Before resizing a running VM, ensure that the guest operating system supports CPU and RAM hot plug (refer to ). Note that otherwise the guest operating system may become unstable after a resize. To increase CPU or RAM resources for such a guest operating system, you need to stop the virtual machine first.
To enable or disable CPU and RAM hot plug for a virtual machine
On the Virtual machines screen, ensure that the required virtual machine in the "Shut down" state, and then click it.
On the Overview tab, click the pencil icon in the CPU and RAM hot plug field.
If you do not see this field, CPU and RAM hot plug is disabled in your project. To enable it, contact your system administrator.
Select or clear the Enable hot plug check box, and then click the tick icon to save the changes.
With CPU and RAM hot plug enabled, you can change the flavor of a running VM.
To change the virtual machine flavor
On the Virtual machines screen, click the required virtual machine.
On the Overview tab, click the pencil icon in the Flavor field.
In the Flavor window, select a new flavor, and then click Done.
Download the agent that you need on the workload that you plan to protect. See Downloading protection agents.
Ensure that the machine is connected to the Internet.
Log on as an administrator and start the installer.
[Optional] Click Customize installation settings and make the appropriate changes if you want:
To change the components to install (for example, to disable the installation of Cyber Protection Monitor or the Command-Line Tool, or to install the Agent for Antimalware protection and URL filtering).
For Windows workloads protected by agent version 15.0.26986 (released in May 2021) or later, the following components are installed dynamically – that is, only when required by a protection plan:
Agent for Antimalware protection and URL filtering – required for the operation of the antimalware protection and URL filtering features.
Agent for Data Loss Prevention – required for the operation of the device control features.
Acronis Cyber Protection Service - required for the operation of the antimalware protection.
By default, these components are not installed. The respective component is automatically installed if a workload becomes protected by a plan in which any of the following modules is enabled:
Antivirus & Antimalware protection
URL filtering
Device control
Similarly, if no protection plan requires antimalware protection, URL filtering, or device control features anymore, the respective component is automatically uninstalled.
Dynamic installation or uninstallation of components takes up to 10 minutes after you change the protection plan. However, if any of the following operations are running, dynamic installation or uninstallation will start after this operation finishes:
Backup
Recovery
Backup replication
Virtual machine replication
Prerequisites
Download the agent that you need on the workload that you plan to protect. See Downloading protection agents.
To install Agent for Mac (x64 or ARM64)
Ensure that the machine is connected to the Internet.
Double-click the installation file (.dmg).
Wait while the operating system mounts the installation disk image.
Double-click Install.
If a proxy server is enabled in your network, click Protection Agent in the menu bar, click Proxy server settings, and then specify the proxy server host name/IP address, port, and credentials.
If prompted, provide administrator credentials.
Click Continue.
Wait until the registration screen appears.
Do one of the following:
If you log in under a company administrator account, register workloads for your company:
Click Register workload.
[If the agent is registered under an account whose tenant is in the Enhanced security mode] Set the encryption password.
If your macOS version is Mojave 10.14.x or later, grant full disk access to the protection agent to enable backup operations.
For instructions, see Grant the 'Full Disk Access' permission to the Cyber Protection agent (64657).
To use the remote desktop functionality, grant the required system permissions to the Connect Agent. For more information, see Granting the required system permissions to the Connect Agent.
Two-factor authentication provides extra protection from unauthorized access to your account. When two-factor authentication is set up, you are required to enter your password (the first factor) and a one-time code (the second factor) to log in to the service console. The one-time code is generated by a special application that must be installed on your mobile phone or another device that belongs to you. Even if someone finds out your login and password, they still will not be able to login without access to your second-factor device.
The one-time code to configure two-factor authentication for your account is generated based on the device's current time and the secret provided by the Cyber Protection service as the QR code or alphanumeric code. During the first login, you need to enter this secret to the authentication application.
To set up two-factor authentication for your account
You can and must configure two-factor authentication for your account when two-factor authentication has been enabled by an administrator for your organization. If two-factor authentication has been enabled while you are logged in to the Cyber Protection service console, you will have to configure it when your current session expires.
Two-factor authentication is enabled for your organization.
You are logged out of the Cyber Protection service console.
Choose a second-factor device.
Most commonly it is a mobile phone, but you can also use a tablet, laptop, or desktop.
Ensure that the device time settings are correct and reflect the actual current time, and that the device locks itself after a period of inactivity.
Install the authentication application on the device. The recommended applications are Google Authenticator or Microsoft Authenticator.
When logging in the next time, you can select the checkbox Trust this browser.... If you do this, the one-time code will not be required when you log in by using this browser on this machine.
If you have a trusted browser, you will be able to log in by using this browser. Nevertheless, when you have a new device, repeat steps 1-3 and 6-7 of the above procedure by using the new device and the saved QR code or alphanumeric code.
If you have not saved the code, ask the administrator or service provider to reset the two-factor authentication for your account, and then repeat steps 1-3 and 6-7 of the above procedure by using the new device.
When logging in, click the Reset two-factor authentication settings link, confirm the operation by entering the one-time code, and then repeat the above procedure by using the new device.
Infrastructure security is the foundation of maintaining secure cloud and server infrastructure. This includes the physical data center security, networking components, and virtualization infrastructure. Bamboozle's infrastructure is continually maintained following internationally recognized security controls. Our infrastructure is monitored 24/7/365 and undergo third-party audits as well targeted testing annually. For physical security, each of our data center colocation providers maintain industry-recognized certifications and our networks are MANRS certified.
Bamboozle networks are collections of servers connected by wires provided by multiple Internet Service Providers (ISP). We develop, document, and maintain a current baseline for all machines and network device hardware. The following list is an example of controls we maintain for network security:
Update the baseline configuration for network devices at least annually or when a significant change occurs.
Use the least privilege method when provisioning infrastructure components. Any unnecessary ports or protocols are disabled. Network scanning is performed to validate that any ports or protocols are in use as defined.
Use industry standard transport protocols such as TLS between devices and Bamboozle data centers, and within data centers themselves.
Employ a defense in-depth strategy for boundary protection, including secure segmentation of network environments through several methods including VLAN segmentation, ACL restrictions, and encrypted communications for remote connectivity.
Define, implement and evaluate processes, procedures, and defense-in-depth techniques for protection, detection, and timely response to network-based attacks.
Bamboozle servers are hardware connected by a network housed in a data center. Every Bamboozle data center implements controls that ensure physical access to the facilities, backup data, and other system components such as virtual systems and servers is restricted. The following list is an example of controls Bamboozle and its data centers maintain for server security:
Biometric, proximity card, and/or personal identification number (PIN) reader systems (varies by data center facility) used to restrict data center access to only those individuals provisioned with access; the systems are also used to monitor, log, and notify personnel of physical security alarms.
Maintain monitoring mechanisms over infrastructure to check server performance, data, traffic, and load capacity.
Detect and route issues experienced by hosts in real time and employ orchestration tooling that has the ability to regenerate hosts.
Bamboozle storage is the physical disk on the server that runs your Droplet. These devices are encrypted at rest based on industry standards. Our storage devices have the same physical security protections as our servers. The following list is an example of additional controls Bamboozle maintains for storage security:
Bamboozle's asset inventory includes serial number tracking for servers, disks, and other assets necessary to provide infrastructure for customers.
Where full disk encryption is used, logical access is managed by FileVault for MacOS and BitLocker for Windows operating systems; Linux encryption occurs during the operating system build, alternatively the home directory is encrypted.
In-scope systems are configured to require at least one of the following authentication requirements:
Cloud hosting environments are broken down into two main parts: the virtual servers that apps and websites can be hosted on, and the physical hosts that manage the virtual servers.
Virtualization makes cloud hosting possible: the relationship between host and virtual server provides flexibility and scaling that are not available through other hosting methods. Virtualization allows multiple Bamboozle customers to host their products on the same disk with inherent logical separation. The following list is an example of security measures we maintain for securing your virtualized instance:
Initial permission definitions, and changes to permissions, associated with logical access roles of production-impacting systems are approved by authorized personnel.
We maintain device configuration policies on security requirements for the configuration and management of devices connecting to corporate services. The policies also apply to infrastructure and virtual instances.
Customer environments are isolated using numerous mechanisms, technologies, policies, processes, and architectural elements. Customer tenants and Virtual Machine deployments are kept logically separated. Customer data may be encrypted in-transit and at-rest through configurable and standards-based providers using a variety of protocols.
If a VM experiences boot problems, you can send it to the rescue mode to access its boot volume. When a VM in the “Active” state is sent to the rescue mode, it is shut down softly first. Once the VM is in the rescue mode, you can connect to it via SSH or via the console. Its previous boot disk is now attached as a secondary one. You can mount the disk and repair it.
Limitations
The rescue mode can use ISO images for booting both Linux and Windows virtual machines and QCOW2 images (templates) for booting Linux VMs.
You can send a VM to the rescue mode only if its current status is “Active” or “Shut down”.
> sc stop VzGuestToolsMonitor
> sc delete VzGuestToolsMonitor> reg delete HKLM\SYSTEM\CurrentControlSet\services\eventlog\Application\\
VzGuestToolsMonitor> reg delete HKLM\SOFTWARE\Microsoft\Windows\CurrentVersion\Run /v \
VzRebootNotifier> sc stop eventlog
> sc start eventlog# yum remove dkms-vzvirtio_balloon prl_nettool qemu-guest-agent-vz \
vz-guest-udevModify firmware environment values
Testing a replica
Running a virtual machine from backup (including finalization)
Disaster recovery failover
Disaster recovery failback
Running a script (for Cyber Scripting functionality)
Patch installation
ESXi configuration backup
In the Register for account list, select the user account under which you want to register the workload.
Click Check code, and then click Confirm registration.
If you log in under a partner administrator account, register workloads for your customers:
Click Register workload.
In the opened browser window, sign in to the service console and review the registration details.
In the Register for account list, select the user account of your customer under which you want to register the workload.
Click Check code, and then click Confirm registration.
Click Show registration info. The setup program shows the registration link and the registration code. If you cannot complete the workload registration on the current machine, copy the registration link and code, and then follow the registration steps on a different machine. In this case, you will need to enter the registration code in the registration form. The registration code is valid for one hour.
Alternatively, you can access the registration form by clicking All devices > Add, scrolling down to Registration via code, and then clicking Register.
Do not quit the setup program until you confirm the registration. To initiate the registration again, you will have to restart the setup program and repeat the installation procedure.
As a result, the workload will be assigned to the account that was used to log in to the service console.
Register the workload manually by using the command line. For more information on how to do this, refer to Registering workloads manually.
Go to the Cyber Protection service console sign in page and set your password.
The service console shows the QR code and the alphanumeric code.
Save the QR code and the alphanumeric code in any convenient way (such as, print out the screen, write down the code, or save the screenshot in cloud storage). If you lose the second-factor device, you will be able to reset the two-factor authentication by using these codes.
Open the authentication application, and then do one of the following:
Scan the QR code
Manually enter the alphanumeric code to the application
The authentication application generates a one-time code. A new code will be generated every 30 seconds.
Return to the service console login page and enter the generated code.
A one-time code is valid for 30 seconds. If you wait longer than 30 seconds, use the next generated code.
Documented logical access policies and procedures to guide personnel in information security practices that include, but are not limited to: password requirements, acceptable use, access provisioning, and access termination
MFA
SSO
SSH
Before resizing a running VM, ensure that the guest operating system has the latest updates installed.
5-8
32
9-16
64
17-32
128
33-64
256
65-128
512
129-256
1024


# apt-get remove vzvirtio-balloon-dkms prl-nettool qemu-guest-agent-vz \
vz-guest-udev# rm -f /usr/bin/prl_backup /usr/share/qemu-ga/VERSION \
/usr/bin/install-tools \
/etc/udev/rules.d/90-guest_iso.rules /usr/local/bin/fstrim-static \
/etc/cron.weekly/fstrim# udevadm control --reloadWith the DHCP server disabled, VM network interfaces will still get IP addresses, but you will have to manually assign them inside VMs.

On Windows machines, the antimalware protection and URL filtering features require the installation of Agent for Antimalware protection and URL filtering. It will be installed automatically for protected workloads if the Antivirus & Antimalware protection or the URL filtering module is enabled in their protection plans.
To change the method of registering the workload in the Cyber Protection service. You can switch from Use service console (default) to Use credentials or Use registration token.
To change the installation path.
To change the user account under which the agent service will run. For details, refer to Changing the logon account on Windows machines.
To verify or change the proxy server host name/IP address, port, and credentials. If a proxy server is enabled in Windows, it is detected and used automatically.
Click Install.
[Only when installing Agent for VMware] Specify the address and access credentials for the vCenter Server or stand-alone ESXi host whose virtual machines the agent will back up, and then click Done. We recommend using an account that has the Administrator role assigned. Otherwise, provide an account with the necessary privileges on the vCenter Server or ESXi.
[Only when installing on a domain controller] Specify the user account under which the agent service will run, and then click Done. For security reasons, the setup program does not automatically create new accounts on a domain controller.
The user account that you specify must be granted the Log on as a service right.
This account must have already been used on the domain controller, in order for its profile folder to be created on that machine.
For more information about installing the agent on a read-only domain controller, refer to this knowledge base article.
If you kept the default registration method Use service console in step 3, wait until the registration screen appears, and then proceed to the next step. Otherwise, no more actions are required.
Do one of the following:
If you log in under a company administrator account, register workloads for your company:
Click Register workload.
In the opened browser window, sign in to the service console and review the registration details.
In the Register for account list, select the user account under which you want to register the workload.
Click Check code, and then click Confirm registration.
If you log in under a partner administrator account, register workloads for your customers:
Click Register workload.
In the opened browser window, sign in to the service console and review the registration details.
In the Register for account list, select the user account of your customer under which you want to register the workload.
Click Show registration info. The setup program shows the registration link and the registration code. If you cannot complete the workload registration on the current machine, copy the registration link and code, and then follow the registration steps on a different machine. In this case, you will need to enter the registration code in the registration form. The registration code is valid for one hour.
Alternatively, you can access the registration form by clicking All devices > Add, scrolling down to Registration via code, and then clicking Register.
Do not quit the setup program until you confirm the registration. To initiate the registration again, you will have to restart the setup program and repeat the installation procedure.
As a result, the workload will be assigned to the account that was used to log in to the service console.
Register the workload manually by using the command line. For more information on how to do this, refer to Registering workloads manually.
[If the agent is registered under an account whose tenant is in the Enhanced security mode] Set the encryption password.
Custom security groups are configured, as instructed in Managing security groups.
An SSH key is added, as outlined in Managing SSH keys. You can specify an SSH key only when creating VMs from a template or boot volume.
On the Virtual machines screen, click Create virtual machine. A window will open where you will need to specify the VM parameters.
Specify a name for the new VM.
Select the VM boot media:
If you have an ISO image or a template
If you have a compute boot volume
If you select an image or volume with an assigned placement, the created VM will also inherit this placement.
After selecting the boot media, volumes required for this media to boot will be automatically added to the Volumes section.
Configure the VM disks:
In the Volumes window, make sure the default boot volume is large enough to accommodate the guest OS. Otherwise, click the ellipsis icon next to it, and then Edit. Change the volume size and click Save.
Add more disks to the VM by creating or attaching volumes. To do this, click the pencil icon in the Volumes section, and then Add or Attach in the Volumes window.
Choose the amount of RAM and CPU resources that will be allocated to the VM in the Flavor section. In the Flavor window, select a flavor, and then click Done.
When choosing a flavor for a VM, ensure it satisfies the hardware requirements of the guest OS.
To select a flavor with an assigned placement, you can filter flavors by placement. The VM created from such a flavor will also inherit this placement
Add network interfaces to the VM in the Networks section:
In the Network interfaces window, click Add to attach a network interface.
In the Add network interface window, select a compute network to connect to, and then specify MAC address, IPv4 and/or IPv6 addresses, and security groups. By default, MAC and primary IP addresses are assigned automatically. To specify them manually, clear the Assign automatically check boxes, and enter the desired addresses. Optionally, assign additional IP addresses to the network interface in the Secondary IP addresses section. Note that a secondary IPv6 address is not available for an IPv6 subnet that works in the SLAAC or DHCPv6 stateless mode.
Secondary IP addresses, unlike the primary one, will not be automatically assigned to the network interface inside the virtual machine guest OS. You should assign them manually.
If you selected a virtual network with enabled IP address management
If you selected a virtual network with disabled IP address management
If you selected a shared physical network
After specifying the network interface parameters, click Add. The network interface will appear in the Network interfaces list.
If required, edit IP addresses and security groups of newly added network interfaces. To do this, click the ellipsis icon, click Edit, and then set the parameters.
When you finish configuring the VM network interfaces, click Done.
If you have chosen to boot from a template or volume, which has cloud-init and OpenSSH installed:
As cloud images have no default password, you can access VMs deployed from them only by using the key authentication method with SSH.
Add an SSH key to the VM, to be able to access it via SSH without a password.
Add user data to customize the VM after launch, for example, change a user password.
Enable CPU and RAM hot plug for the VM in Advanced options, to be able to change its flavor when the VM is running. You can also enable hot plug after the VM is created.
If you do not see this option, CPU and RAM hot plug is disabled in your project. To enable it, contact your system administrator.
If you have chosen to boot from an ISO image, enable UEFI boot in Advanced options, to be able to boot the VM in the UEFI mode. This option cannot be configured after the VM is created.
You cannot configure UEFI boot if you have selected a template as the VM boot media. If your template has UEFI boot enabled, the option is automatically enabled for the VM, and vice versa.
After configuring all of the VM parameters, click Deploy to create and boot the VM.
If you are deploying the VM from an ISO image, you need to install the guest OS inside the VM by using the built-in VNC console. For VMs with UEFI boot enabled, open the VNC console, and then press any key to boot from the chosen ISO image. Virtual machines created from a template or a boot volume already have a preinstalled guest OS.
Select a VM, and then click Console on its right pane. The console will open in a separate browser window. In the console, you can send a key combination to a VM, take a screenshot of the console window, and download the console log (refer to Troubleshooting virtual machines).
During the launch an instance, a default user will be created, and this user will have no password set. Instead, your SSH key is copied to the VM and you will be able to login to the machine via SSH using the default username. The default username varies between Operating Systems. Here are the usernames for our official distributions:
Specify the username and VM IP or Elastic IP address in the SSH terminal:
Linux cloud images have the default login, depending on the operating system, for example, centos or ubuntu. To connect to a Windows VM, enter the username that you specified during Cloudbase-Init installation.
If you have deployed a VM without specifying an SSH key, you also need to enter a password to log in to the VM.
There are only three actions available for the VM in the rescue mode: Console, Exit rescue mode, and Delete.
If a rescue image has cloud-init installed, then the VM booted from it can be accessed with the same SSH key that was used for its creation.
Prerequisites
Virtual machines are created, as described in Creating virtual machines.
To put a virtual machine to the rescue mode
On the Virtual machines screen, click the required VM on the list.
On the VM right pane, click the ellipsis button on the toolbar. Then, click Enter rescue mode.
In the Enter rescue mode window, select an image to rescue the VM with. By default, the initial image used for creating the VM is selected. Click Enter.
The machine status changes to “Rescue”.
To return a virtual machine to normal operation
On the Virtual machines screen, click the required VM on the list.
On the VM right pane, click Exit rescue mode.
In the Exit rescue mode window, click Exit. The VM will be automatically rebooted.
The VM status changes to “Active” and it boots from the original root disk.
If the VM status changes to “Error” when exiting the rescue mode, you can reset its status with the Reset state action. The VM should then return to the “Rescue” status again.
To exit the rescue mode for a Windows VM
There might be an issue of exiting the rescue mode for a Windows VM. If in the rescue mode you set the original system disk online, its ID becomes the same as that of the rescue disk. Then, when you try to exit the rescue mode, the boot loader cannot find the proper boot disk. To resolve the ID conflict, follow the steps:
With the VM in the rescue mode, open the Disk Management window and note the numbers of the original system disk (offline) and the rescue disk (online). Set the original system disk to Online.
To edit the boot configuration, enter the following command in the Command Prompt window:
Review the output and check that the rescue disk is the target for objects in the output (partition=<the rescue disk name>).
If the objects do not point to drive C, fix it with the following commands:
To view the available disks, enter the following commands in the command line:
Match the disk number and name to those displayed in the Disk Management window.
To get the ID of the rescue disk, run the following commands:
Record the disk ID, you will need it later.
Change this ID by using the following command:
Make sure that the value has changed with the UNIQUEID DISK command.
Assign the ID that you recorded previusly to the original system disk:
Make sure that the value has changed with the UNIQUEID DISK command.
You should now be able to exit the rescue mode.
Windows guests have neither Cloudbase-Init nor OpenSSH Server preinstalled by default. You need to install and configure them manually.
Log in to a Windows VM.
Create a new administrator account that will be used for SSH connections and log in with it.
To install and configure OpenSSH Server:
Run Windows PowerShell with administrator privileges and set the execution policy to unrestricted to be able to run scripts:
Download OpenSSH Server (for example, from the ), extract the archive into the C:\Program Files directory, and then install it by running:
Download Cloudbase-Init from , and then install it by following the procedure from the Installation section at .
The password for the user specified during the Cloudbase-Init installation will be reset on the next VM startup. If this user does not exist, a new user account will be created. You will be able to log in with this account by using the key authentication method or you can set a new password with a customization script. If there are multiple Windows users at the image preparation time, the passwords for other users will not be changed.
When the Cloudbase-Init installation is complete, do not select the option to run Sysprep before clicking Finish. Otherwise, you will not be able to modify cloudbase-init.conf.
Run Windows PowerShell with administrator privileges and open the file C:\Program Files\Cloudbase Solutions\Cloudbase-Init\conf\cloudbase-init.conf:
Add metadata_services and plugins on two lines:
Make sure to remove all backslashes in the lines above.
Save the changes.
Prerequisites
Download the agent that you need on the machine that you plan to protect. See Downloading protection agents.
To install Agent for Linux, you need at least 2 GB of free disk space.
To install Agent for Linux
Ensure that the machine is connected to the Internet.
As the root user, navigate to directory with the installation file, make the file executable, and then run it.
If a proxy server is enabled in your network, when running the installation file, specify the server host name/IP address and port in the following format: --http-proxy-host=ADDRESS --http-proxy-port=PORT --http-proxy-login=LOGIN --http-proxy-password=PASSWORD.
If you want to change the default method of registering the machine in the Cyber Protection service, run the installation file with one of the following parameters:
Select the check boxes for the agents that you want to install. The following agents are available:
Agent for Linux
Agent for Virtuozzo
Agent for Oracle
If you kept the default registration method in step 2, proceed to the next step. Otherwise, enter the user name and password for the Cyber Protection service, or wait until the machine will be registered by using the token.
Do one of the following:
If you log in under a company administrator account, register workloads for your company:
Click Register workload.
[If the agent is registered under an account whose tenant is in the Enhanced security mode] Set the encryption password.
If the UEFI Secure Boot is enabled on the machine, you are informed that you need to restart the system after the installation. Be sure to remember what password (the one of the root user or "acronis") should be used.
The installation generates a new key that is used for signing the kernel modules. You must enroll this new key to the Machine Owner Key (MOK) list by restarting the machine. Without enrolling the new key, your agent will not be operational. If you enable the UEFI Secure Boot after the agent is installed, you need to reinstall the agent.
After the installation completes, do one of the following:
Click Restart, if you were prompted to restart the system in the previous step.
During the system restart, opt for MOK (Machine Owner Key) management, choose Enroll MOK, and then enroll the key by using the password recommended in the previous step.
Otherwise, click Exit.
Troubleshooting information is provided in the file: /usr/lib/Acronis/BackupAndRecovery/HOWTO.INSTALL
Choose an agent, depending on what you are going to back up. For more information on the possible choices, refer to Which agent do I need?
Ensure that there is enough free space on your hard drive to install an agent. For detailed information about the required space, refer to .
Download the setup program. To find the download links, click All devices > Add.
The Add devices page provides web installers for each agent that is installed in Windows. A web installer is a small executable file that downloads the main setup program from the Internet and saves it as a temporary file. This file is deleted immediately after the installation.
If you want to store the setup programs locally, download a package containing all agents for installation in Windows by using the link at the bottom of the Add devices page. Both 32-bit and 64-bit packages are available. These packages enable you to customize the list of components to install. These packages also enable unattended installation, for example, via Group Policy. This advanced scenario is described in Deploying agents through Group Policy.
To download the setup program for Agent for Microsoft 365, click the account icon in the top-right corner, and then click Downloads > Agent for Microsoft 365.
Installation in Linux and macOS is performed from ordinary setup programs.
All setup programs require an Internet connection to register the machine in the Cyber Protection service. If there is no Internet connection, the installation will fail.
Cyber Protect features require Microsoft Visual C++ 2017 Redistributable. Please ensure that it is already installed on your machine or install it before installing the agent. After the installation of Microsoft Visual C++, a restart may be required. You can find the Microsoft Visual C++ Redistributable package here .
Verify that your firewalls and other components of your network security system (such as a proxy sever) allow outbound connections through the following TCP ports.
Ports 443 and 8443
These ports are used for accessing the service console, registering the agents, downloading the certificates, user authorization, and downloading files from the cloud storage.
Ports in the range 7770 – 7800
The agents use these ports to communicate with the management server.
Ports 44445 and 55556
If a proxy server is enabled in your network, refer to Proxy server settings to understand whether you need to configure these settings on each machine that runs a protection agent.
The minimum Internet connection speed required for managing an agent from the cloud is 1 Mbit/s (not to be confused with the data transfer rate acceptable for backing up to the cloud). Consider this if you use a low-bandwidth connection technology such as ADSL.
Port 443
Agent for VMware (both Windows and Virtual Appliance) connects to this port on the ESXi host/vCenter server to perform VM management operations, such as create, update, and delete VMs on vSphere during backup, recovery, and VM replication operations.
Port 902
Agent for VMware (both Windows and Virtual Appliance) connects to this port on the ESXi host to establish NFC connections to read/write data on VM disks during backup, recovery, and VM replication operations.
The Downloader component is responsible for delivering updates to a computer and distributing them to other Downloader instances. It can run in agent mode which turns its computer into Downloader agent. The Downloader agent downloads updates from the internet and serves as the source of updates distribution to other computers. The Downloader requires the following ports to operate.
Port 6888
Used by the BitTorrent protocol for torrent peer-to-peer updates.
Port 6771
Used as the local peer discovery port. Also takes part in peer-to-peer updates.
Port 18018
Used for communication between updaters working in different modes: Updater and UpdaterAgent.
On the machine where you plan to install the protection agent, verify that the following local ports are not in use by other processes.
127.0.0.1:9999
127.0.0.1:43234
127.0.0.1:9850
The Active Protection service is listening at TCP port 6110. Verify that it is not in use by another process.
Some of the ports required by the protection agent might be in use by other applications in your environment. To avoid conflicts, you can change the default ports used by the protection agent by modifying the following files.
In Linux: /opt/Acronis/etc/aakore.yaml
In Windows: \ProgramData\Acronis\Agent\etc\aakore.yaml
We want to make the Internet a safer place for everyone to live, work, and prosper. We believe in holding ourselves accountable to maintaining the trust of our customers and only collecting the data necessary to serve our customers.
We collect self-reported data, which is data you voluntarily provide so we can provide our service. Self-reported data includes account data such as email address, provided name, and billing information. This also includes customer-provided user preferences and the information in support tickets.
We also receive data from third parties about you and collect data when you interact with our service. Depending on how you use our products and services, interaction data may include things like internet protocol (IP) addresses, browser type, internet service provider (ISP), referring/exit pages, operating system, date/time stamp, clickstream data, landing page, and referring URL.
More information about data we collect can be found in our .
If you use a credit or debit card as your payment method, we process your payments through a third party payment processor, which stores and maintains your complete payment information on our behalf. We do not store your complete payment card number ourselves.
Different data has different uses. We believe our covers a lot of the details for specific data types but to summarize, we use the data we collect to provide you with the best experience possible. We use data to improve our product and market new products we think you will enjoy. We believe that all data use should provide you with value and we are committed everyday to balancing our data collection practices with your privacy in mind.
Employees do not have access to the content of your Virtual or Dedicated Servers unless you give us permission for support, we are required to access them as part of an active abuse or fraud investigation or where access is necessary to comply with a valid legal process.
Please share the link to our Security Information with your customers. We are working on building out more assets in this space to actually prove our commitment to protecting your trust. We believe that being transparent about how we secure Bamboozle and your data is more valuable than third-party compliance certifications. However, we understand that at times auditors and third parties are interested in these certifications.
We have a dedicated Certifications Report page for these types of requests. If you have any specific questions that are not answered, please contact your account manager.
We believe in the right to privacy for all of our customers. However, we do provide specific disclosures regarding how we comply with . For any specific questions, please reach out to .
We love a free and open internet at Bamboozle, and we also accept that means the internet can be a bit of a mixed bag. Hanging a server onto the internet with a public-facing IP means within seconds, bots, brute-forcers, and stressors may happen.
We suggest these resources to help protect your server:
Add SSH keys when you create new Virtual Server or Dedicated Server or add SSH keys to existing VMs or Servers..
Add a firewall
Have multiple VMs that only need to talk to each other? Use our Virtual Private Networks.
For our Infrastructure as a Service products, we secure the system and the network your service runs on, inclusive of the management control plane.
If you are someone who uses our PaaS products, we extend our responsibility for security of those platforms further up-stack. Secure configurations, access, and patching are all part of the as-a-Service model for these products.
We’ll regularly communicate with you on major security mitigations throughout our fleet, such as those for processor class vulnerabilities.
The data you store is always yours to own and secure. We provide guidance and a handful of technologies on our platform for you to secure your instances. As we release new security functionality, we’ll update you in the Trust & Security section of our blog.
Tight role-based access, two-factor authentication, secure network zones and secrets management underpin our approach to securing our management layer. Vulnerability and patch management as well as security observability tools help us keep on top of the ever-shifting risk in our infrastructure. We’re also currently on the path toward a broader “zero-trust” model for access to resources within our environment.
Although there are many reasons that we may need to alter or disable portions of our infrastructure, such as to maintain the integrity of our systems in an emergency, we do not typically take down customers’ infrastructure without warning under normal circumstances. However, our customers are sometimes targeted by malicious actors in ways outside of our control. For all our well-intended customers and community members whose VMs or Servers might have been compromised and started doing illegal or harmful things on the internet, you may have your network interface shut down until you’re ready to recover and address the issue. In these cases, we’ll send you an email immediately upon shutting off the network interface and walk you through recovery. We always recommend employing best practices to secure your services, and more resources on this topic can be found in the Trust & Security section of our blog.
The dark side of the internet does exist, and there are those looking to harm others or defraud companies like us. It is a tricky balance to maintain and everyday we strive to keep the Internet a safer place for everyone.
We strive to create a safe, resilient environment where our customers and community can innovate with confidence. While we do a lot of things to make sure our environment is safe, we can make mistakes. When we do, we want you to let us know!
If you have discovered a vulnerability, please report it! We partner with HackerOne to run a public vulnerability disclosure program. We will not take legal action against nor ask law enforcement to investigate researchers who reach out and work with us in good faith, including:
Sharing the full details of the issue with us
Making a good faith effort to avoid violating our customers’ (or our) privacy, destroying data, and interrupting or degrading our services
Bamboozle is committed to working with third-party data center providers that maintain industry-leading access control, including video surveillance, security, access lists, and exit procedures. We regularly audit our data centers to meet our regulatory requirements and validate proper implementation of our security requirements.
Besides basic Amazon S3 operations like GET, PUT, COPY, DELETE, the Bamboozle Object Storage implementation of the Amazon S3 protocol supports the following features:
Multipart upload
Access control lists (ACLs)
Versioning
# ssh <username>@<VM_IP_address>> bcdedit /store <the original system disk name>:\boot\bcd> bcdedit /store <the original system disk name>:\boot\bcd \
/set {default} osdevice partition=<the rescue disk name>:
> bcdedit /store <the original system disk name>:\boot\bcd \
/set {default} device partition=<the rescue disk name>:
> bcdedit /store <the original system disk name>:\boot\bcd \
/set {bootmgr} device partition=<the rescue disk name>:
> bcdedit /store <the original system disk name>:\boot\bcd \
/set {memdiag} device partition=<the rescue disk name>:Click Check code, and then click Confirm registration.
Linux: FreeRDP
Specify the Pubic or Elastic IP address in the client and provide the default username Administrator and the password specified during the deployment.
Ubuntu Linux
ubuntu
CentOS Linux
centos
Debian Linux
debian
Alma Linux
alma
If the Agent for VMware (Virtual Appliance) is running on the ESXi host/cluster that is the target for VM replication, VM replication traffic does not go directly to the ESXi host on port 902. Instead, the traffic goes from the source Agent for VMware to TCP port 3333 on the Agent for VMware (Virtual Appliance) located on the target ESXi host/cluster.
The source Agent for VMware that reads data from the original VM disks can be anywhere else and can be of any type: Virtual Appliance or Windows.
The service that is responsible for accepting VM replication data on the target Agent for VMware (Virtual Appliance) is called “Replica disk server.” This service is responsible for the WAN optimization techniques, such as traffic compression and deduplication during VM replication, including replica seeding (see Seeding an initial replica). When no Agent for VMware (Virtual Appliance) is running on the target ESXi host, this service is not available, and therefore the replica seeding scenario is not supported.
Port 18019
Local port, used for communication between the Updater and the protection agent.

--register-with-credentials – to ask for a user name and password during the installation--token=STRING – to use a registration token
--skip-registration – to skip the registration
Agent for MySQL/MariaDB
Agent for Virtuozzo, Agent for Oracle, and Agent for MySQL/MariaDB require that Agent for Linux (64-bit) is also installed.
In the Register for account list, select the user account under which you want to register the workload.
Click Check code, and then click Confirm registration.
If you log in under a partner administrator account, register workloads for your customers:
Click Register workload.
In the opened browser window, sign in to the service console and review the registration details.
In the Register for account list, select the user account of your customer under which you want to register the workload.
Click Check code, and then click Confirm registration.
Click Show registration info. The setup program shows the registration link and the registration code. If you cannot complete the workload registration on the current machine, copy the registration link and code, and then follow the registration steps on a different machine. In this case, you will need to enter the registration code in the registration form. The registration code is valid for one hour.
Alternatively, you can access the registration form by clicking All devices > Add, scrolling down to Registration via code, and then clicking Register.
Do not quit the setup program until you confirm the registration. To initiate the registration again, you will have to restart the setup program and repeat the installation procedure.
As a result, the workload will be assigned to the account that was used to log in to the service console.
Register the workload manually by using the command line. For more information on how to do this, refer to Registering workloads manually.
sshd service and set its startup type to “Automatic”:Open TCP port 22 for the OpenSSH service in the Windows Firewall:
On Windows 8.1, Windows Server 2012, and newer versions, run:
On Windows Server 2008/2008 R2, run:
Open the C:\ProgramData\ssh\sshd_config file:
Comment out the following lines at the end of the file:
Save the changes.
Create the .ssh directory in C:\Users\<current_user> and an empty authorized_keys file inside it:
Remove the .txt extension from the created file:
Modify the permissions for the created file to disable inheritance:
> DISKPART
> LIST DISK> SELECT DISK <the rescue disk number>
> UNIQUEID DISK> UNIQUEID DISK id=<any hex value of 8 characters>> SELECT DISK <the original system disk number>
> UNIQUEID DISK id=<the recorded disk ID>chmod +x <installation file name>./<installation file name>> New-NetFirewallRule -Protocol TCP -LocalPort 22 -Direction Inbound -Action Allow -DisplayName OpenSSH> netsh advfirewall firewall add rule name=sshd dir=in action=allow protocol=TCP localport=22> notepad 'C:\ProgramData\ssh\sshd_config'#Match Group administrators
#AuthorizedKeysFile __PROGRAMDATA__/ssh/administrators_authorized_keys> cd C:\Users\<current_user>
> mkdir .ssh
> notepad .\.ssh\authorized_keys> move .\.ssh\authorized_keys.txt .\.ssh\authorized_keys> icacls .\.ssh\authorized_keys /inheritance:r> Set-ExecutionPolicy Unrestricted> & 'C:\Program Files\OpenSSH-Win64\install-sshd.ps1'> notepad 'C:\Program Files\Cloudbase Solutions\Cloudbase-Init\conf\cloudbase-init.conf'metadata_services=\
cloudbaseinit.metadata.services.configdrive.ConfigDriveService,\
cloudbaseinit.metadata.services.httpservice.HttpService
plugins=cloudbaseinit.plugins.common.mtu.MTUPlugin,\
cloudbaseinit.plugins.windows.ntpclient.NTPClientPlugin,\
cloudbaseinit.plugins.common.sethostname.SetHostNamePlugin,\
cloudbaseinit.plugins.windows.createuser.CreateUserPlugin,\
cloudbaseinit.plugins.common.networkconfig.NetworkConfigPlugin,\
cloudbaseinit.plugins.windows.licensing.WindowsLicensingPlugin,\
cloudbaseinit.plugins.common.sshpublickeys.SetUserSSHPublicKeysPlugin,\
cloudbaseinit.plugins.windows.extendvolumes.ExtendVolumesPlugin,\
cloudbaseinit.plugins.common.setuserpassword.SetUserPasswordPlugin,\
cloudbaseinit.plugins.common.userdata.UserDataPlugin,\
cloudbaseinit.plugins.windows.winrmlistener.ConfigWinRMListenerPlugin,\
cloudbaseinit.plugins.windows.winrmcertificateauth.\
ConfigWinRMCertificateAuthPlugin,\
cloudbaseinit.plugins.common.localscripts.LocalScriptsPlugin> net start sshd
> Set-Service sshd -StartupType AutomaticWhen you finish configuring the VM disks, click Done.

Windows Server 2022
Essentials
No
No
Standard, Datacenter
Yes
Yes
Windows Server 2019
Essentials
No
No
Standard, Datacenter
Yes
Yes
* CPU hot plug does not work properly due to a Windows bug with a wrongly installed driver.
Rocky Linux
8.x, 9.x
Yes
Yes
AlmaLinux
8.x, 9.x
Yes
Yes
Signed URLs
Object locking
Geo-replication
Server access logging
Object storage classes
Cross-region replication (CRR)
Bucket policies
Object expiration
Cross-origin resource sharing (CORS)
The following authentication schemes are supported by the Bamboozle Object Storage implementation of the Amazon S3 protocol:
The following authentication methods are supported by the Bamboozle Object Storage implementation of the Amazon S3 protocol:
The following authentication method is not supported:
The following Amazon S3 REST request headers are currently supported by the Bamboozle Object Storage implementation of the Amazon S3 protocol:
Authorization
Content-Length
Content-Type
Content-MD5
Date
Host
x-amz-content-sha256
x-amz-date
x-amz-security-token
x-amz-object-lock-retain-until-date
x-amz-object-lock-mode
x-amz-object-lock-legal-hold
x-amz-bypass-governance-retention
x-amz-bucket-object-lock-enabled
x-amz-geo-endpoint
x-amz-geo-access-key
x-amz-geo-access-secret
The following Amazon S3 REST response headers are currently supported by the Bamboozle Object Storage implementation of the Amazon S3 protocol:
Content-Length
Content-Type
Connection
Date
ETag
x-amz-delete-marker
x-amz-request-id
x-amz-version-id
x-amz-object-lock-retain-until-date
x-amz-object-lock-mode
x-amz-object-lock-legal-hold
x-amz-geo-endpoint
x-amz-geo-access-key
x-amz-geo-access-secret
The following Amazon S3 REST response headers are not used:
Server
x-amz-id-2
The following Amazon S3 REST error response headers are currently supported by the Bamboozle Object Storage implementation of the Amazon S3 protocol:
Code
Error
Message
The following Amazon S3 REST error response headers are not supported:
RequestId (not used)
Resource
The Flow Object Storage implementation of the Amazon S3 object lifecycle only supports object expiration by prefix. Deleting objects by tag is not available. The rule definition for object expiration is similar to that for bucket policies.
The following S3 object expiration actions are currently supported:
Expiration. Deletes objects by age or by date. In case of versioning, inserts a delete marker, which becomes the latest version of an object. Delete markers are not removed.
NonCurrentVersionExpiration. Deletes an object version after it has become non-current for the specified number of days.
AbortIncompleteMultipartUpload. Aborts a multipart upload that has not completed during the specified number of days.
ExpiredObjectDeleteMarker. Deletes a delete marker as soon as there are no other versions of an object.
Virtual machine flavors with a healthy balance of vCPU, RAM and Storage.
Standard-01_1vCPU_0.5GB
1
0.5
$ 5.90
Standard-02_1vCPU_1GB
1
1
¹ Monthly prices are based on 730 hours of usage.
To add the necessary modules to the Linux kernel, the setup program needs the following Linux packages:
The package with kernel headers or sources. The package version must match the kernel version.
The GNU Compiler Collection (GCC) compiler system. The GCC version must be the one with which the kernel was compiled.
The Make tool.
The Perl interpreter.
The libelf-dev, libelf-devel, or elfutils-libelf-devel libraries for building kernels starting with 4.15 and configured with CONFIG_UNWINDER_ORC=y. For some distributions, such as Fedora 28, they need to be installed separately from kernel headers.
The names of these packages vary depending on your Linux distribution.
In Red Hat Enterprise Linux, CentOS, and Fedora, the packages normally will be installed by the setup program. In other distributions, you need to install the packages if they are not installed or do not have the required versions.
To check whether the packages are already installed, perform these steps:
Run the following command to find out the kernel version and the required GCC version:
This command returns lines similar to the following: Linux version 2.6.35.6 and gcc version 4.5.1
Run the following command to check whether the Make tool and the GCC compiler are installed:
For gcc, ensure that the version returned by the command is the same as in the gcc version in step 1. For make, just ensure that the command runs.
The following table lists how to install the required packages in various Linux distributions.
The packages will be downloaded from the distribution's repository and installed.
For other Linux distributions, please refer to the distribution's documentation regarding the exact names of the required packages and the ways to install them.
You may need to install the packages manually if:
The machine does not have an active Red Hat subscription or Internet connection.
The setup program cannot find the kernel-devel or gcc version corresponding to the kernel version. If the available kernel-devel is more recent than your kernel, you need to either update the kernel or install the matching kernel-devel version manually.
You have the required packages on the local network and do not want to spend time for automatic search and downloading.
Obtain the packages from your local network or a trusted third-party website, and install them as follows:
In Red Hat Enterprise Linux, CentOS, or Fedora, run the following command as the root user:
In Ubuntu, run the following command:
Follow these steps to install the required packages in Fedora 14 on a 32-bit machine:
Run the following command to determine the kernel version and the required GCC version:
The output of this command includes the following:
Obtain the kernel-devel and gcc packages that correspond to this kernel version:
Obtain the make package for Fedora 14:
The protection agents can transfer data through an HTTP/HTTPS proxy server. The server must work through an HTTP tunnel without scanning or interfering with the HTTP traffic. Man-in-the-middle proxies are not supported.
Because the agent registers itself in the cloud during the installation, the proxy server settings must be provided during the installation or in advance.
If a proxy server is configured in Windows (Control panel > Internet Options > Connections), the setup program reads the proxy server settings from the registry and uses them automatically. Also, you can enter the proxy settings during the installation, or specify them in advance by using the procedure described below. To change the proxy settings after the installation, use the same procedure.
To specify the proxy settings in Windows
Create a new text document and open it in a text editor, such as Notepad.
Copy and paste the following lines into the file:
Replace proxy.company.com with your proxy server host name/IP address, and 000001bb with the hexadecimal value of the port number. For example, 000001bb is port 443.
If your proxy server requires authentication, replace proxy_login and proxy_password with the proxy server credentials. Otherwise, delete these lines from the file.
Run the installation file with the parameters --http-proxy-host=ADDRESS --http-proxy-port=PORT --http-proxy-login=LOGIN--http-proxy-password=PASSWORD. To change the proxy settings after the installation, use the procedure described below.
To change the proxy settings in Linux
Open the file /etc/Acronis/Global.config in a text editor.
Do one of the following:
If the proxy settings were specified during the agent installation, find the following section:
You can enter the proxy settings during the installation, or specify them in advance by using the procedure described below. To change the proxy settings after the installation, use the same procedure.
To specify the proxy settings in macOS
Create the file /Library/Application Support/Acronis/Registry/Global.config and open it in a text editor, such as Text Edit.
Copy and paste the following lines into the file
Replace proxy.company.com with your proxy server host name/IP address, and 443 with the decimal value of the port number.
If your proxy server requires authentication, replace proxy_login and proxy_password with the proxy server credentials. Otherwise, delete these lines from the file.
When working under bootable media, you may need to access the cloud storage via a proxy server. To specify the proxy server settings, click Tools > Proxy server, and then specify the proxy server host name/IP address, port, and credentials.
Windows Server 2016
Essentials
No
No
Standard, Datacenter
Yes*
Yes
Windows Server 2012 R2
Essentials, Standard, Datacenter
Yes
Yes
Windows Server 2012
Standard, Datacenter
Yes
Yes
Windows Server 2008 R2
Standard, Datacenter
No
No
Windows 10
Home, Professional, Enterprise, Enterprise 2016 LTSB
No
No
Windows 8.1
Home, Professional, Enterprise
No
No
CentOS
8.x, 9.x
Yes
Yes
Red Hat Enterprise Linux
8.x, 9.x
Yes
Yes
Debian
12.x, 11.x, 10.x
Yes
Yes
Ubuntu
20.04.x, 22.04.x, 24.04.x
Yes
Yes
Oracle Linux
8.x, 9.x
Yes
Yes
$ 10.90
Standard-03_1vCPU_2GB
1
2
$ 20.90
Standard-04_2vCPU_2GB
2
2
$ 49.90
Standard-05_2vCPU_4GB
2
4
Standard-06_2vCPU_8GB
2
8
Standard-07_4vCPU_4GB
4
4
Standard-08_4vCPU_8GB
4
8
Standard-09_4vCPU_16GB
4
16
Standard-10_8vCPU_8GB
8
8
Standard-11_8vCPU_16GB
8
16
Standard-12_8vCPU_32GB
8
32
Standard-13_16vCPU_16GB
16
16
Standard-14_16vCPU_32GB
16
32
Standard-15_6vCPU_24GB
6
24
Standard-16_6vCPU_32GB
6
32
Standard-17_24vCPU_64GB
24
64
Standard-18_48vCPU_128GB
48
128
Save the document as proxy.reg.
Run the file as an administrator.
Confirm that you want to edit the Windows registry.
If the protection agent is not installed yet, you can install it now.
Open file %programdata%\Acronis\Agent\etc\aakore.yaml in a text editor.
Locate the env section or create it and add the following lines:
Replace proxy_login and proxy_password with the proxy server credentials, and proxy_address:port with the address and port number of the proxy server.
In the Start menu, click Run, type: cmd, and click OK.
Restart the aakore service by using the following commands:
Restart the agent by using the following commands:
<registry name="Global">...</registry>Replace ADDRESS with the new proxy server host name/IP address, and PORT with the decimal value of the port number.
If your proxy server requires authentication, replace LOGIN and PASSWORD with the proxy server credentials. Otherwise, delete these lines from the file.
Save the file.
Open file /opt/acronis/etc/aakore.yaml in a text editor.
Locate the env section or create it and add the following lines:
Replace proxy_login and proxy_password with the proxy server credentials, and proxy_address:port with the address and port number of the proxy server.
Restart the aakore service by using the following command:
Restart the agent by executing the following command in any directory:
Save the file.
If the protection agent is not installed yet, you can install it now.
Open file /Library/Application Support/Acronis/Agent/etc/aakore.yaml in a text editor.
Locate the env section or create it and add the following lines:
Replace proxy_login and proxy_password with the proxy server credentials, and proxy_address:port with the address and port number of the proxy server.
Go to Applications > Utilities > Terminal
Restart the aakore service by using the following commands:
Restart the agent by using the following commands:
env:
    http-proxy: proxy_login:proxy_password@proxy_address:port
https-proxy: proxy_login:proxy_password@proxy_address:portnet stop aakore
net start aakorenet stop mms
net start mmsenv:
http-proxy: proxy_login:proxy_password@proxy_address:port
https-proxy: proxy_login:proxy_password@proxy_address:portsudo service aakore restartsudo service acronis_mms restartenv:
http-proxy: proxy_login:proxy_password@proxy_address:port
https-proxy: proxy_login:proxy_password@proxy_address:portsudo launchctl stop aakore
sudo launchctl start aakoresudo launchctl stop acronis_mms
sudo launchctl start acronis_mmsWindows Registry Editor Version 5.00
[HKEY_LOCAL_MACHINE\SOFTWARE\Acronis\Global\HttpProxy]
"Enabled"=dword:00000001
"Host"="proxy.company.com"
"Port"=dword:000001bb
"Login"="proxy_login"
"Password"="proxy_password"<key name="HttpProxy">
<value name="Enabled" type="Tdword">"1"</value>
<value name="Host" type="TString">"ADDRESS"</value>
<value name="Port" type="Tdword">"PORT"</value>
<value name="Login" type="TString">"LOGIN"</value>
<value name="Password" type="TString">"PASSWORD"</value>
</key><?xml version="1.0" ?>
<registry name="Global">
<key name="HttpProxy">
<value name="Enabled" type="Tdword">"1"</value>
<value name="Host" type="TString">"proxy.company.com"</value>
<value name="Port" type="Tdword">"443"</value>
<value name="Login" type="TString">"proxy_login"</value>
<value name="Password" type="TString">"proxy_password"</value>
</key>
</registry>Check whether the appropriate version of the packages for building kernel modules is installed:
In Red Hat Enterprise Linux, CentOS, and Fedora, run the following command:
In Ubuntu, run the following commands:
In either case, ensure that the package versions are the same as in Linux version in step 1.
Run the following command to check whether the Perl interpreter is installed:
If you see the information about the Perl version, the interpreter is installed.
In Red Hat Enterprise Linux, CentOS, and Fedora, run the following command to check whether elfutils-libelf-devel is installed:
If you see the information about the library version, the library is installed.
Run the following command:
Ubuntu
Debian
linux-headers linux-image gcc make perl
Run the following commands:
SUSE Linux
OpenSUSE
kernel-source gcc make perl
You can specify all these packages in a single rpm command. Installing any of these packages may require installing additional packages to resolve dependencies.
Red Hat Enterprise Linux
kernel-devel gcc make elfutils-libelf-devel
The setup program will download and install the packages automatically by using your Red Hat subscription.
perl
Run the following command:
CentOS
Fedora
kernel-devel gcc make elfutils-libelf-devel
The setup program will download and install the packages automatically.
perl
yum list installed | grep kernel-develdpkg --get-selections | grep linux-headers
dpkg --get-selections | grep linux-imageperl --versionyum list installed | grep elfutils-libelf-develcat /proc/versionmake -v
gcc -vyum install perlrpm -ivh PACKAGE_FILE1 PACKAGE_FILE2 PACKAGE_FILE3sudo dpkg -i PACKAGE_FILE1 PACKAGE_FILE2 PACKAGE_FILE3cat /proc/versionLinux version 2.6.35.6-45.fc14.i686
gcc version 4.5.1kernel-devel-2.6.35.6-45.fc14.i686.rpm
gcc-4.5.1-4.fc14.i686.rpmmake-3.82-3.fc14.i686rpm -ivh kernel-devel-2.6.35.6-45.fc14.i686.rpm
rpm -ivh gcc-4.5.1.fc14.i686.rpm
rpm -ivh make-3.82-3.fc14.i686yum install perlsudo apt-get update
sudo apt-get install linux-headers-$(uname -r)
sudo apt-get install linux-image-$(uname -r)
sudo apt-get install gcc-<package version>
sudo apt-get install make
sudo apt-get install perlsudo zypper install kernel-source
sudo zypper install gcc
sudo zypper install make
sudo zypper install perlSelecting an agent depends on what you are going to back up. The table below summarizes the information, to help you decide.
In Windows, Agent for Exchange, Agent for SQL, Agent for Active Directory, and Agent for Oracle require that Agent for Windows is also installed. Thus, if you install, for example, Agent for SQL, you also will be able to back up the entire machine where the agent is installed.
It is recommended to install Agent for Windows when you install also Agent for VMware (Windows) and Agent for Hyper-V.
In Linux, Agent for Oracle and Agent for Virtuozzo require that Agent for Linux (64-bit) is also installed. These three agents share one installer.
*During the installation, Agent for Exchange checks for enough free space on the machine where it will run. Free space equal to 15 percent of the biggest Exchange database is temporarily needed during a granular recovery.
**If your ESXi uses a SAN attached storage, install the agent on a machine connected to the same SAN. The agent will back up the virtual machines directly from the storage rather than via the ESXi host and LAN. For detailed instructions, refer to "Agent for VMware - LAN-free backup".
***For Virtuozzo 7, only ploop containers are supported. Virtual machines are not supported.
****A virtual machine is considered virtual if it is backed up by an external agent. If an agent is installed in the guest system, the backup and recovery operations are the same as with a physical machine. Nevertheless, if Cyber Protection can identify a virtual machine by using the CPUID instruction, a virtual machine service quota is assigned to it. If you use direct passthrough or another option that masks the CPU manufacturer ID, only service quotas for physical machines can be assigned.
Physical machines
Physical machines running Windows
Agent for Windows
On the machine that will be backed up.
Physical machines running Linux
Agent for Linux
Physical machines running macOS
Agent for Mac
Applications
SQL databases
Agent for SQL
On the machine running Microsoft SQL Server.
MySQL databases
Agent for MySQL/MariaDB
On the machine running MySQL Server.
MariaDB databases
Agent for MySQL/MariaDB
On the machine running MariaDB Server.
Exchange databases
Agent for Exchange
On the machine running the Mailbox role of Microsoft Exchange Server.*
Microsoft 365 mailboxes
Agent for Microsoft 365
On a Windows machine that is connected to the Internet.
Depending on the desired functionality, you may or may not need to install Agent for Microsoft 365. For more information, refer to "Protecting Microsoft 365 data".
Microsoft 365 OneDrive files and SharePoint Online sites
—
This data can be backed up only by an agent that is installed in the cloud. For more information, refer to "Protecting Microsoft 365 data".
Google Workspace Gmail mailboxes, Google Drive files, and Shared drive files
—
This data can be backed up only by an agent that is installed in the cloud. For more information, refer to "Protecting Google Workspace".
Machines running Active Directory Domain Services
Agent for Active Directory
On the domain controller.
Machines running Oracle Database
Agent for Oracle
On the machine running Oracle Database.
Virtual machines
VMware ESXi virtual machines
Agent for VMware (Windows)
On a Windows machine that has network access to vCenter Server and to the virtual machine storage.**
Agent for VMware (Virtual Appliance)
On the ESXi host.
Hyper-V virtual machines
Agent for Hyper-V
On the Hyper-V host.
Scale Computing HC3 virtual machines
Agent for Scale Computing HC3 (Virtual Appliance)
On the Scale Computing HC3 host.
Red Hat Virtualization virtual machines (managed by oVirt)
Agent for oVirt (Virtual Appliance)
On the Red Hat Virtualization host.
Virtuozzo virtual machines and containers***
Agent for Virtuozzo
On the Virtuozzo host.
Virtuozzo Hybrid Infrastructure virtual machines
Agent for Virtuozzo Hybrid Infrastructure
On the Virtuozzo Hybrid Infrastructure host.
Virtual machines hosted on Amazon EC2
The same as for physical machines****
On the machine that will be backed up.
Virtual machines hosted on Windows Azure
Citrix XenServer virtual machines
Red Hat Virtualization (RHV/RHEV)
Kernel-based Virtual Machines (KVM)
Oracle virtual machines
Nutanix AHV virtual machines
Mobile devices
Mobile devices running Android
Mobile app for Android
On the mobile device that will be backed up.
Mobile devices running iOS
Mobile app for iOS
The Cyber Protect features are supported on the following operating systems:
Windows: Windows 7 Service Pack 1 and later, Windows Server 2008 R2 Service Pack 1 and later.
Windows Defender Antivirus management is supported on Windows 8.1 and later.
Linux: CentOS 6.10, 7.8+, CloudLinux 6.10, 7.8+, Ubuntu 16.04.7+, where plus refers to minor versions of these distributions.
Other Linux distributions and versions might be supported, but have not been tested.
macOS: 10.13.x and later (only Antivirus and Antimalware protection, and Device control are supported). Device control functionality is supported on macOS 10.15 and later or macOS 11.2.3 and later.
Agent for Data Loss Prevention might be installed on unsupported macOS systems because it is an integral part of Agent for Mac. In this case, the Cyber Protect console will display that Agent for Data Loss Prevention is installed on the computer, but the device control functionality will not work. Device control functionality will only work on macOS systems that are supported by Agent for Data Loss Prevention.
The Cyber Protect features are only supported for machines on which a protection agent is installed. For virtual machines protected in agentless mode, for example, by Agent for Hyper-V, Agent for VMware, Agent for Virtuozzo Hybrid Infrastructure, Agent for Scale Computing, or Agent for oVirt only backup is supported.
No
No
Office Workers (Cyber Protect antivirus)
Yes
No
No
Cyber Protect Essentials (only for Cyber Protect Essentials edition)
Yes
No
No
Forensic backup
Collecting memory dump
Yes
No
No
Snapshot of running processes
Yes
No
No
Notarization of local image forensic backup
Yes
No
No
Notarization of cloud image forensic backup
Yes
No
No
Continuous data protection (CDP)
CDP for files and folders
Yes
No
No
CDP for changed files via application tracking
Yes
No
No
Autodiscovery and remote installation
Network-based discovery
Yes
No
No
Active Directory-based discovery
Yes
No
No
Template-based discovery (importing machines from a file)
Yes
No
No
Manual adding of devices
Yes
No
No
Active Protection
Process Injects detection
Yes
No
No
Automatic recovery of affected files from the local cache
Yes
Yes
Yes
Self-defense for backup files
Yes
No
No
Self-defense for Bamboozle software
Yes
No
Yes
Trusted/blocked process management
Yes
No
Yes
Processes/folders exclusions
Yes
Yes
Yes
Ransomware detection based on a process behavior (AI-based)
Yes
Yes
Yes
Cryptomining process detection based on process behavior
Yes
No
No
External drives protection (HDD, flash drives, SD cards)
Yes
No
Yes
Network folder protection
Yes
No
Yes
Server-side protection
Yes
No
No
Zoom, Cisco Webex, Citrix Workspace, and Microsoft Teams protection
Yes
No
No
Antivirus and Antimalware protection
Fully-integrated Active Protection functionality
Yes
No
No
Real-time antimalware protection
Yes
Yes, when Advanced antimalware is enabled
Yes, when Advanced antimalware is enabled
Advanced real-time antimalware protection with local signature-based detection
Yes
Yes
Yes
Static analysis for portable executable files
Yes
No
Yes
On-demand antimalware scanning
Yes
Yes
Yes
Network folder protection
Yes
Yes
No
Server-side protection
Yes
No
No
Scan of archive files
Yes
No
Yes
Scan of removable drives
Yes
No
Yes
Scan of only new and changed files
Yes
No
Yes
File/folder exclusions
Yes
No
Yes
Processes exclusions
Yes
No
Yes
Behavioral analysis engine
Yes
No
Yes
Exploit prevention
Yes
No
No
Quarantine
Yes
Yes
Yes
Quarantine auto clean-up
Yes
No
Yes
URL filtering (http/https)
Yes
No
No
Corporate-wide whitelist
Yes
No
Yes
Microsoft Defender Antivirus management
Yes
No
No
Microsoft Security Essentials management
Yes
No
No
Registering and managing Antivirus and Antimalware protection via Windows Security Center
Yes
No
No
Vulnerability assessment
Vulnerability assessment of operating system and its native applications
Yes
Yes
Yes
Vulnerability assessment for 3rd-party applications
Yes
No
Yes
Patch management
Patch auto-approval
Yes
No
No
Patch auto-installation
Yes
No
No
Patch testing
Yes
No
No
Manual patch installation
Yes
No
No
Patch scheduling
Yes
No
No
Fail-safe patching: backup of machine before installing patches as part of protection plan
Yes
No
No
Cancelation of a machine reboot if a backup is running
Yes
No
No
Data protection map
Adjustable definition of important files
Yes
No
No
Scanning machines to find unprotected files
Yes
No
No
Unprotected locations overview
Yes
No
No
Ability to start the protection action from the Data protection map widget (Protect all files action)
Yes
No
No
Disk health
AI-based HDD and SSD health control
Yes
No
No
Smart protection plans based on Acronis Cyber Protection Operations
Center (CPOC) alerts
Threat feed
Yes
No
No
Threat feed
Yes
No
No
Backup scanning
Antimalware scan of image backups as part of backup plan
Yes
No
No
Scanning of image backups for malware in cloud
Yes
No
No
Malware scan of encrypted backups
Yes
No
No
Safe recovery
Antimalware scanning with Antivirus and Antimalware protection during the recovery process
Yes
No
No
Safe recovery for encrypted backups
Yes
No
No
Remote desktop connection
Connection via NEAR
Yes
Yes
Yes
Connection via RDP
Yes
No
No
Connection via Screen sharing
No
No
Yes
Connection via web client
Yes
No
No
Connection via Quick Assist
Yes
Yes
Yes
Remote assistance
Yes
Yes
Yes
File transfer
Yes
Yes
Yes
Screenshot transmission
Yes
Yes
Yes
#CyberFit Score
#CyberFit Score status
Yes
No
No
#CyberFit Score standalone tool
Yes
No
No
#CyberFit Score recommendations
Yes
No
No
Data loss prevention
Device control
Yes
No
Yes
Management options
Web-based centralized and remote management console
Yes
Yes
Yes
Cyber Protect Monitor
Cyber Protect Monitor app
Yes
No
Yes
Protection status for Zoom
Yes
No
No
Protection status for Cisco Webex
Yes
No
No
Protection status for Citrix Workspace
Yes
No
No
Protection status for Microsoft Teams
Yes
No
No
Software inventory
Software inventory scanning
Yes
No
Yes
Software inventory monitoring
Yes
No
Yes
Hardware inventory
Hardware inventory scanning
Yes
No
Yes
Hardware inventory monitoring
Yes
No
Yes
Default protection plans
Remote Workers
Yes
No
No
Office Workers (third-party antivirus)
Yes
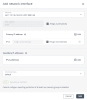
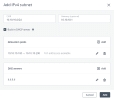